Handheld Controller Operation
This stage covers the core functional operations of the robot, including various motion controls in both Full Body Mode and Upper Limb Mode. The flowchart is as follows:
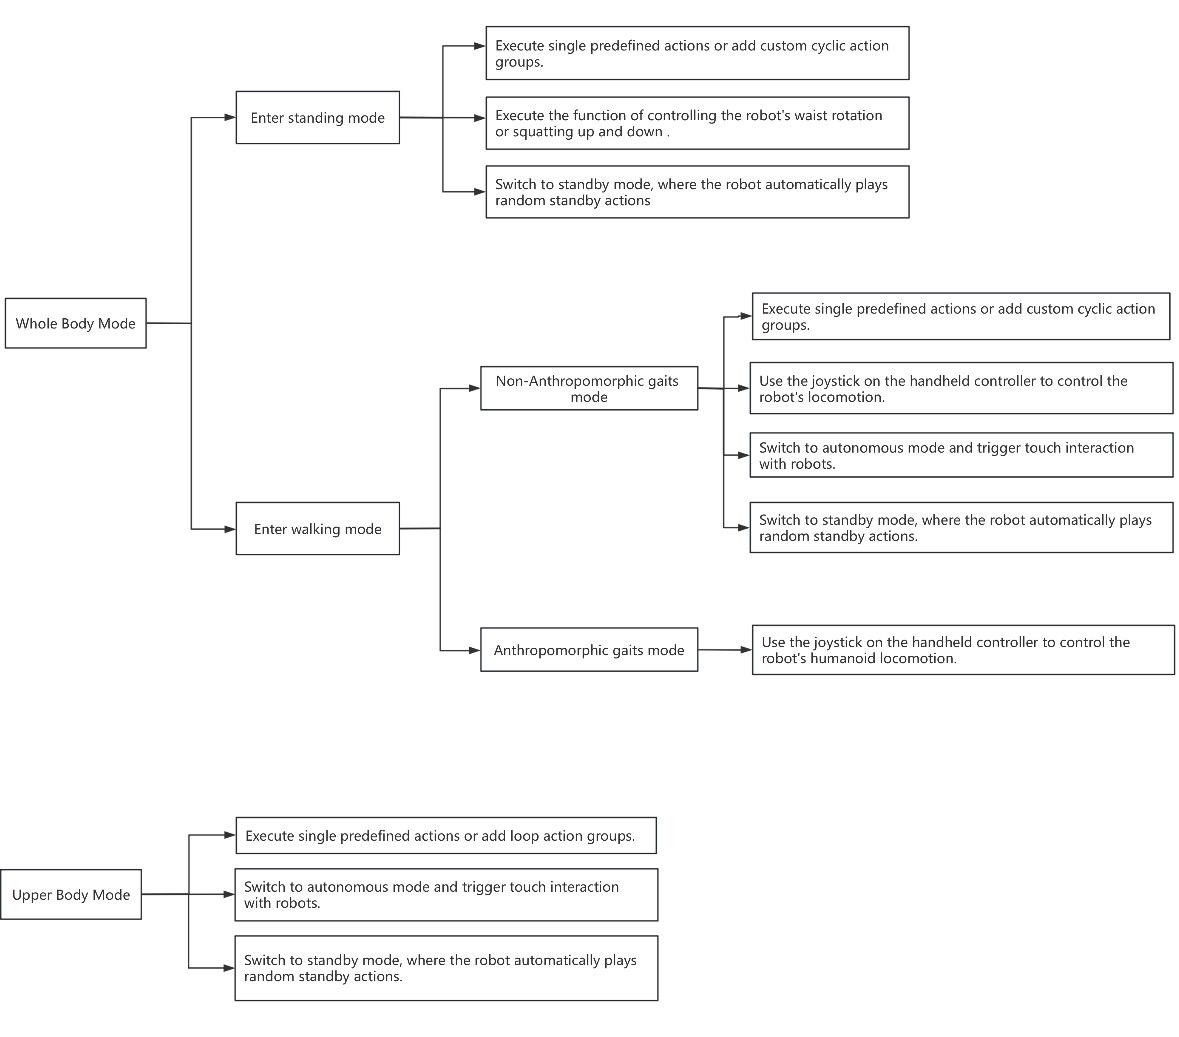
Whole Body Mode Operation
In Whole Body Mode, all actuators are powered on and enabled, allowing access to the robot's full range of motion capabilities, including but not limited to walking, upper body interaction, video transmission, touch interaction and so on.
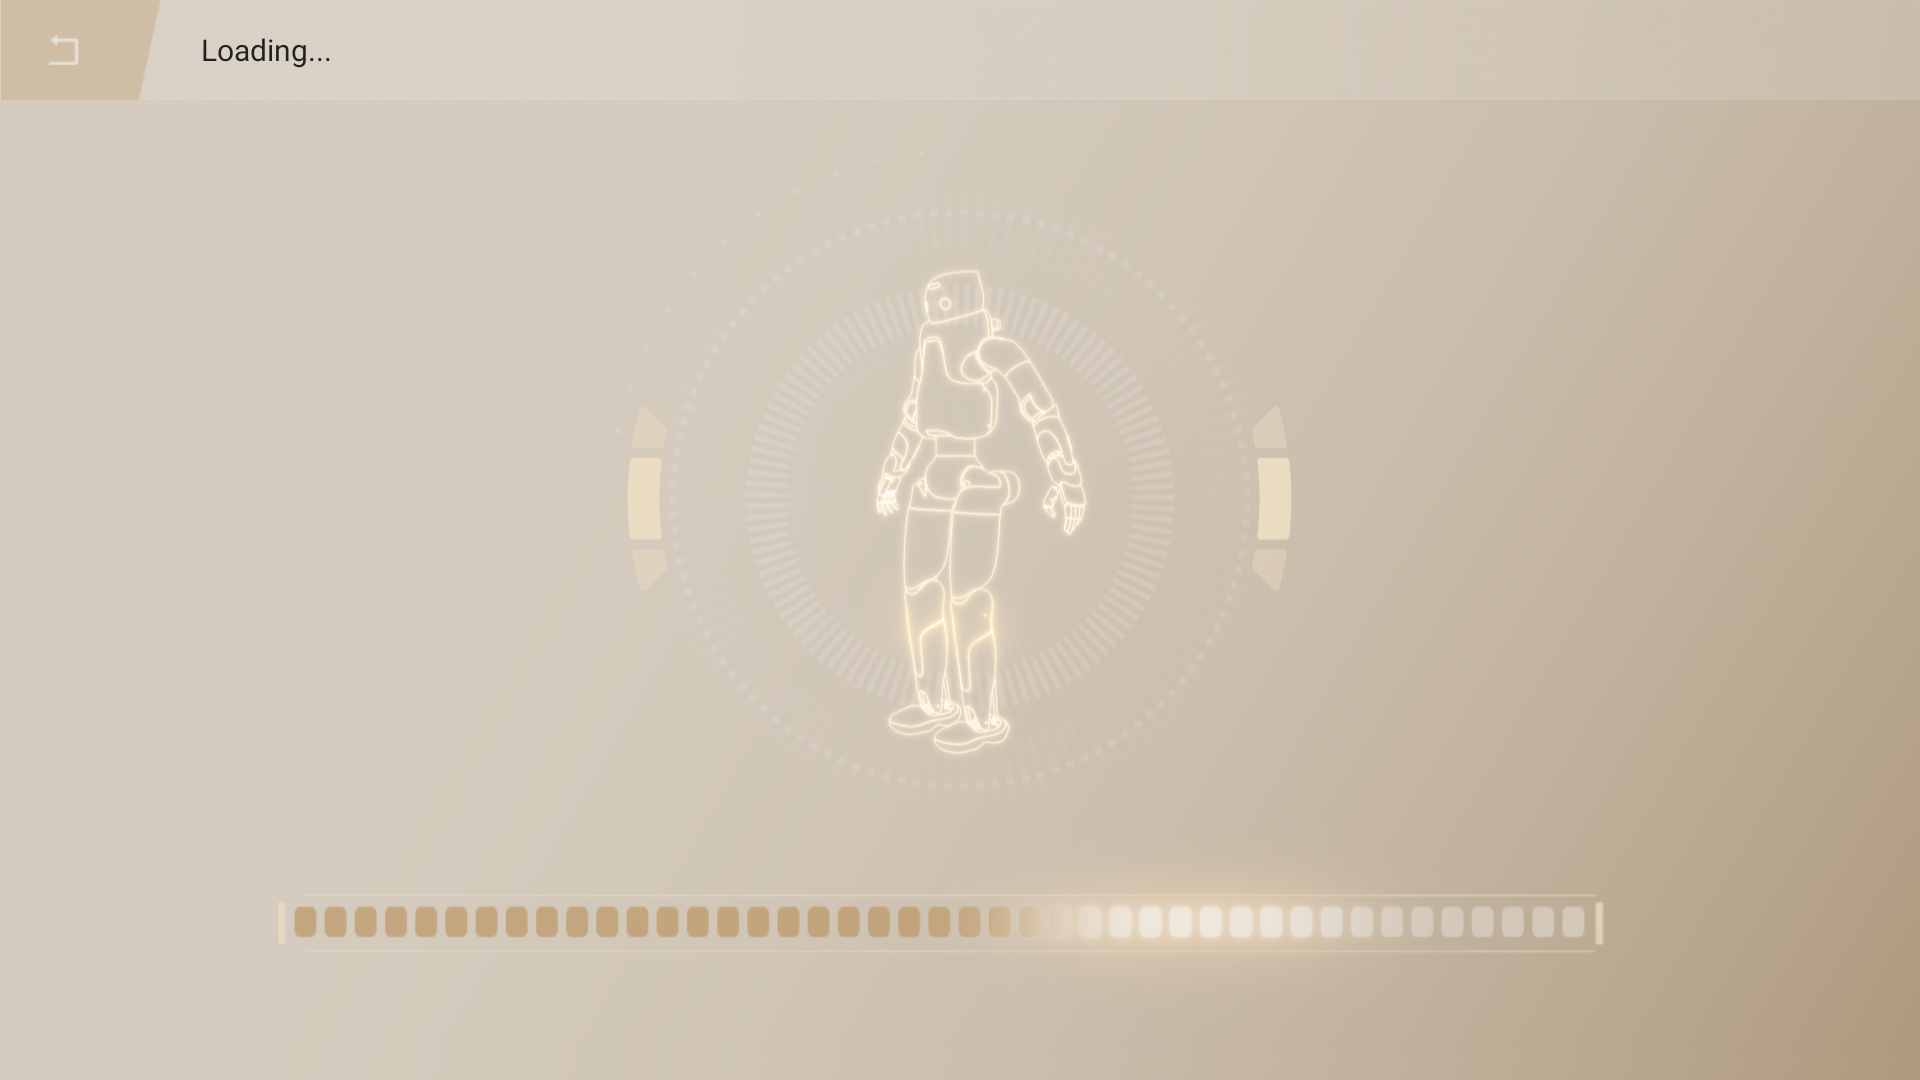
Startup
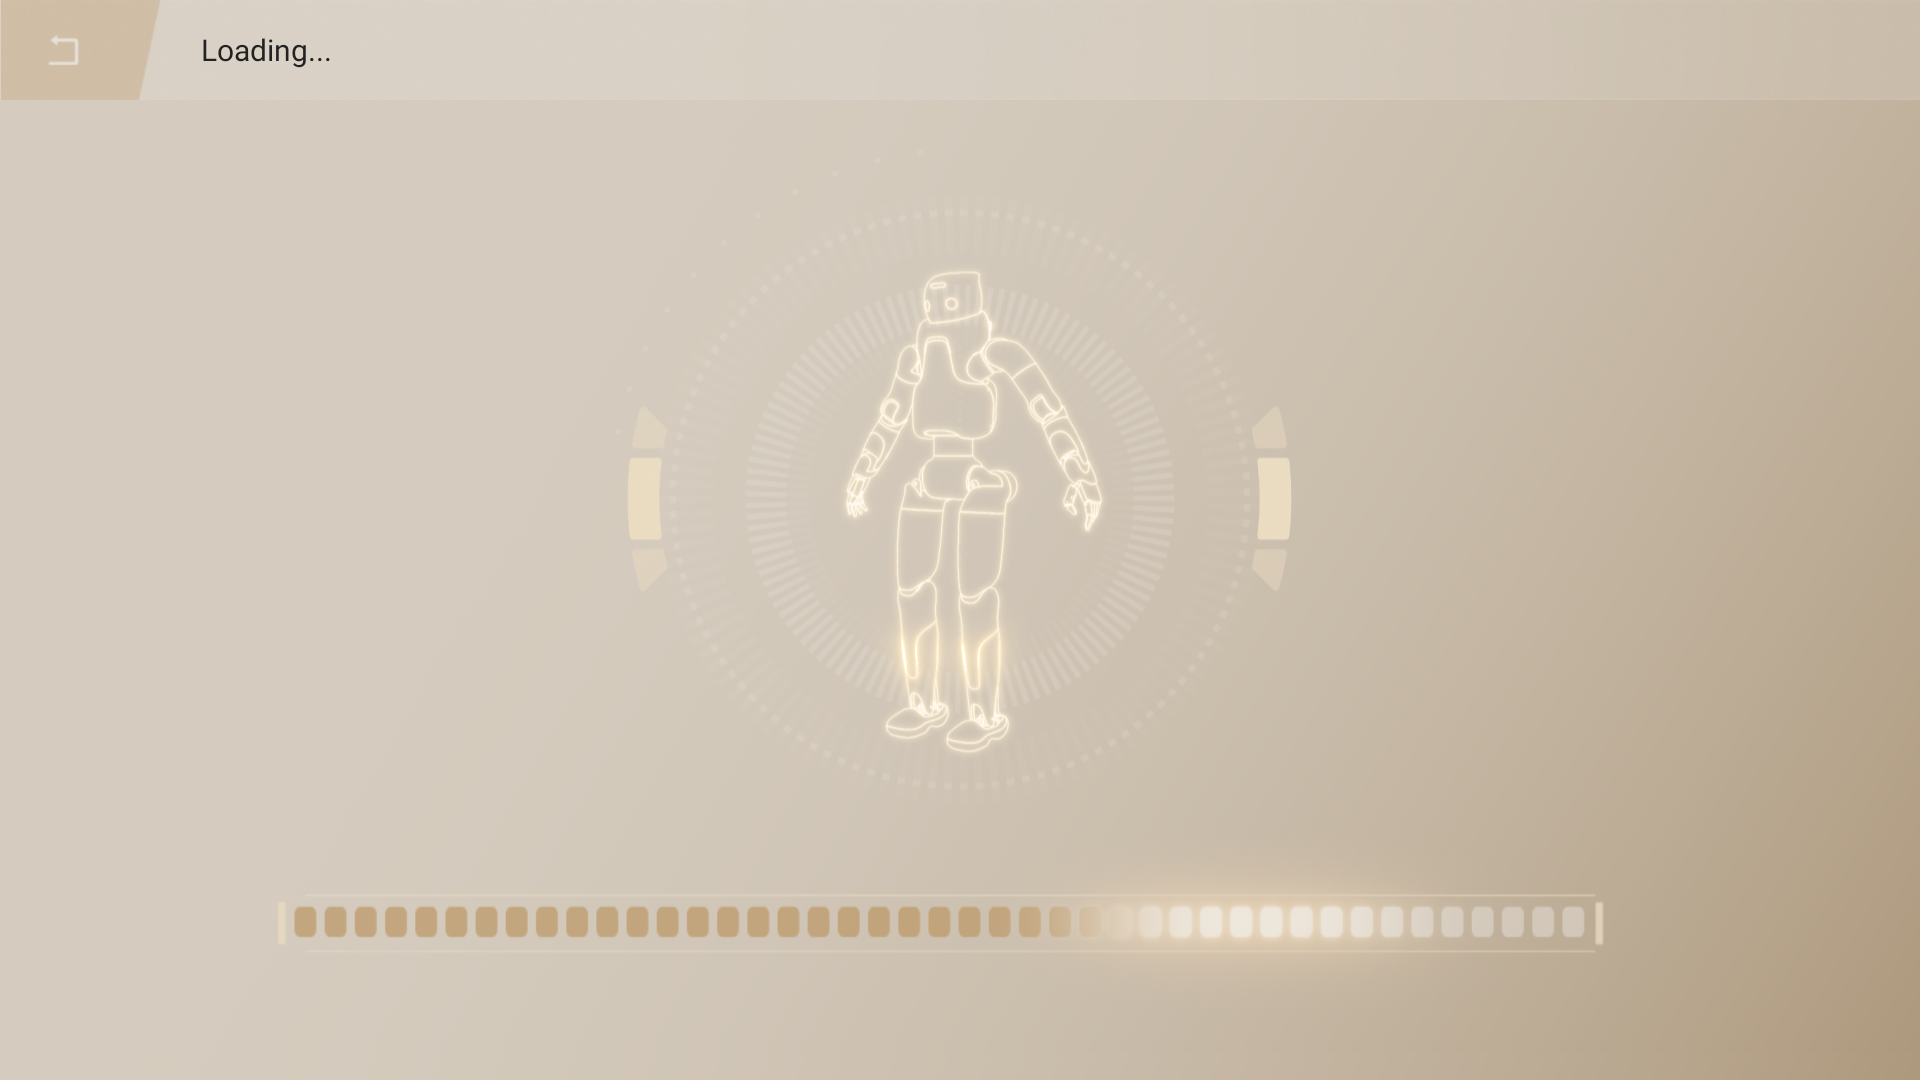
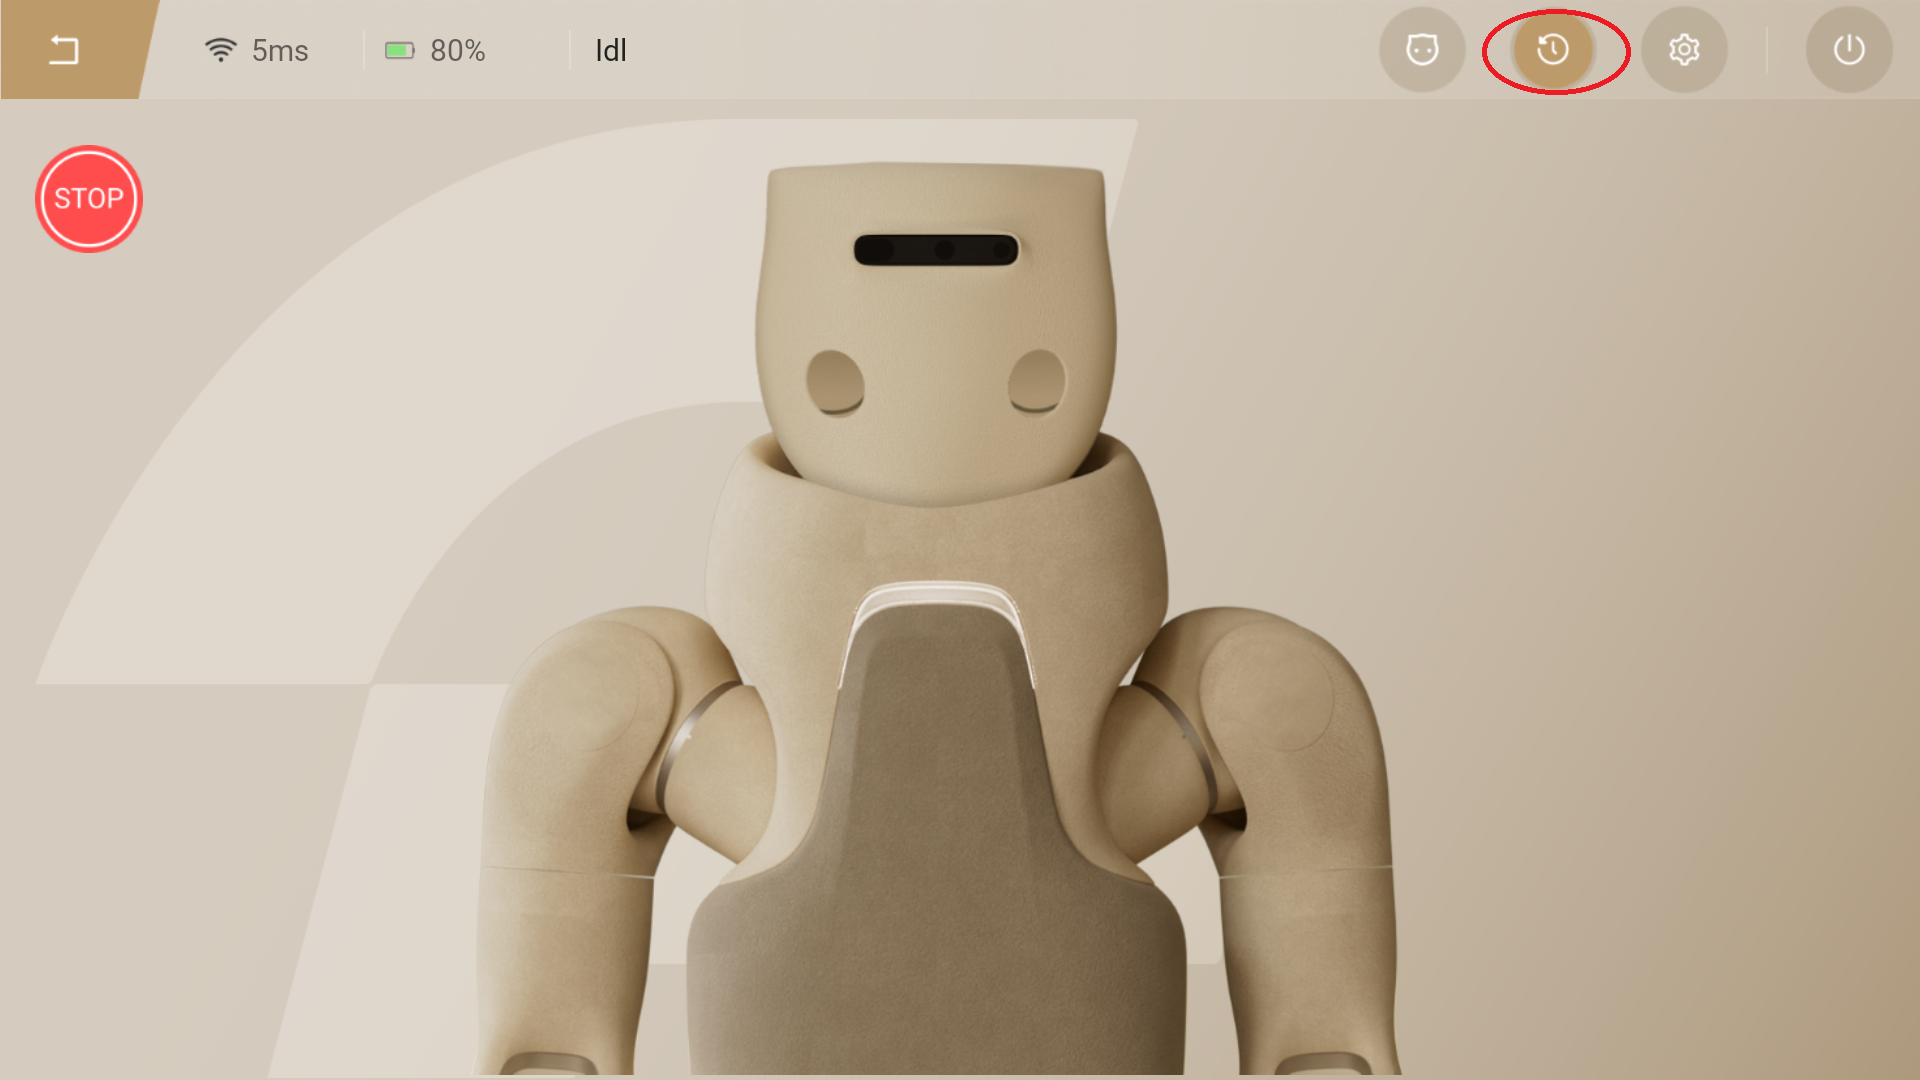
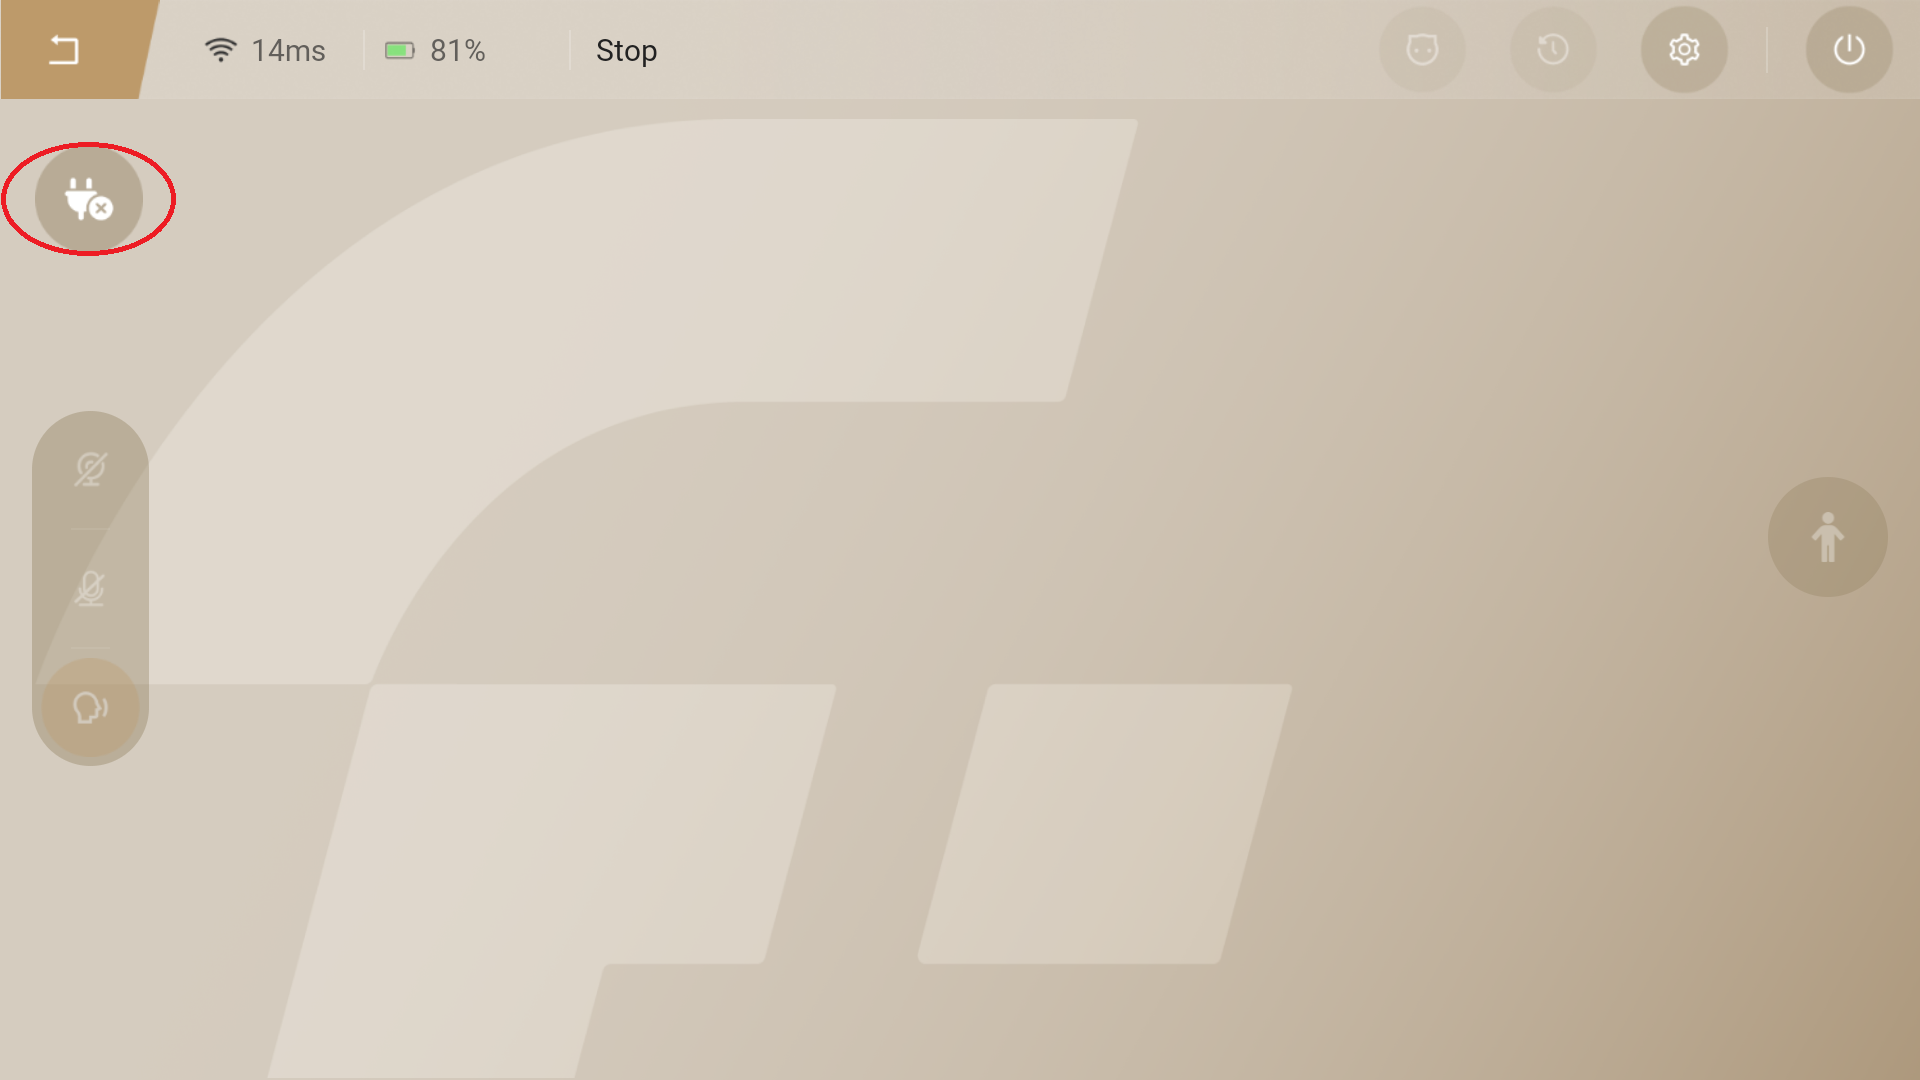
- The following interface will be displayed during the startup process. And the system will enter the Whole Body Mode by default.
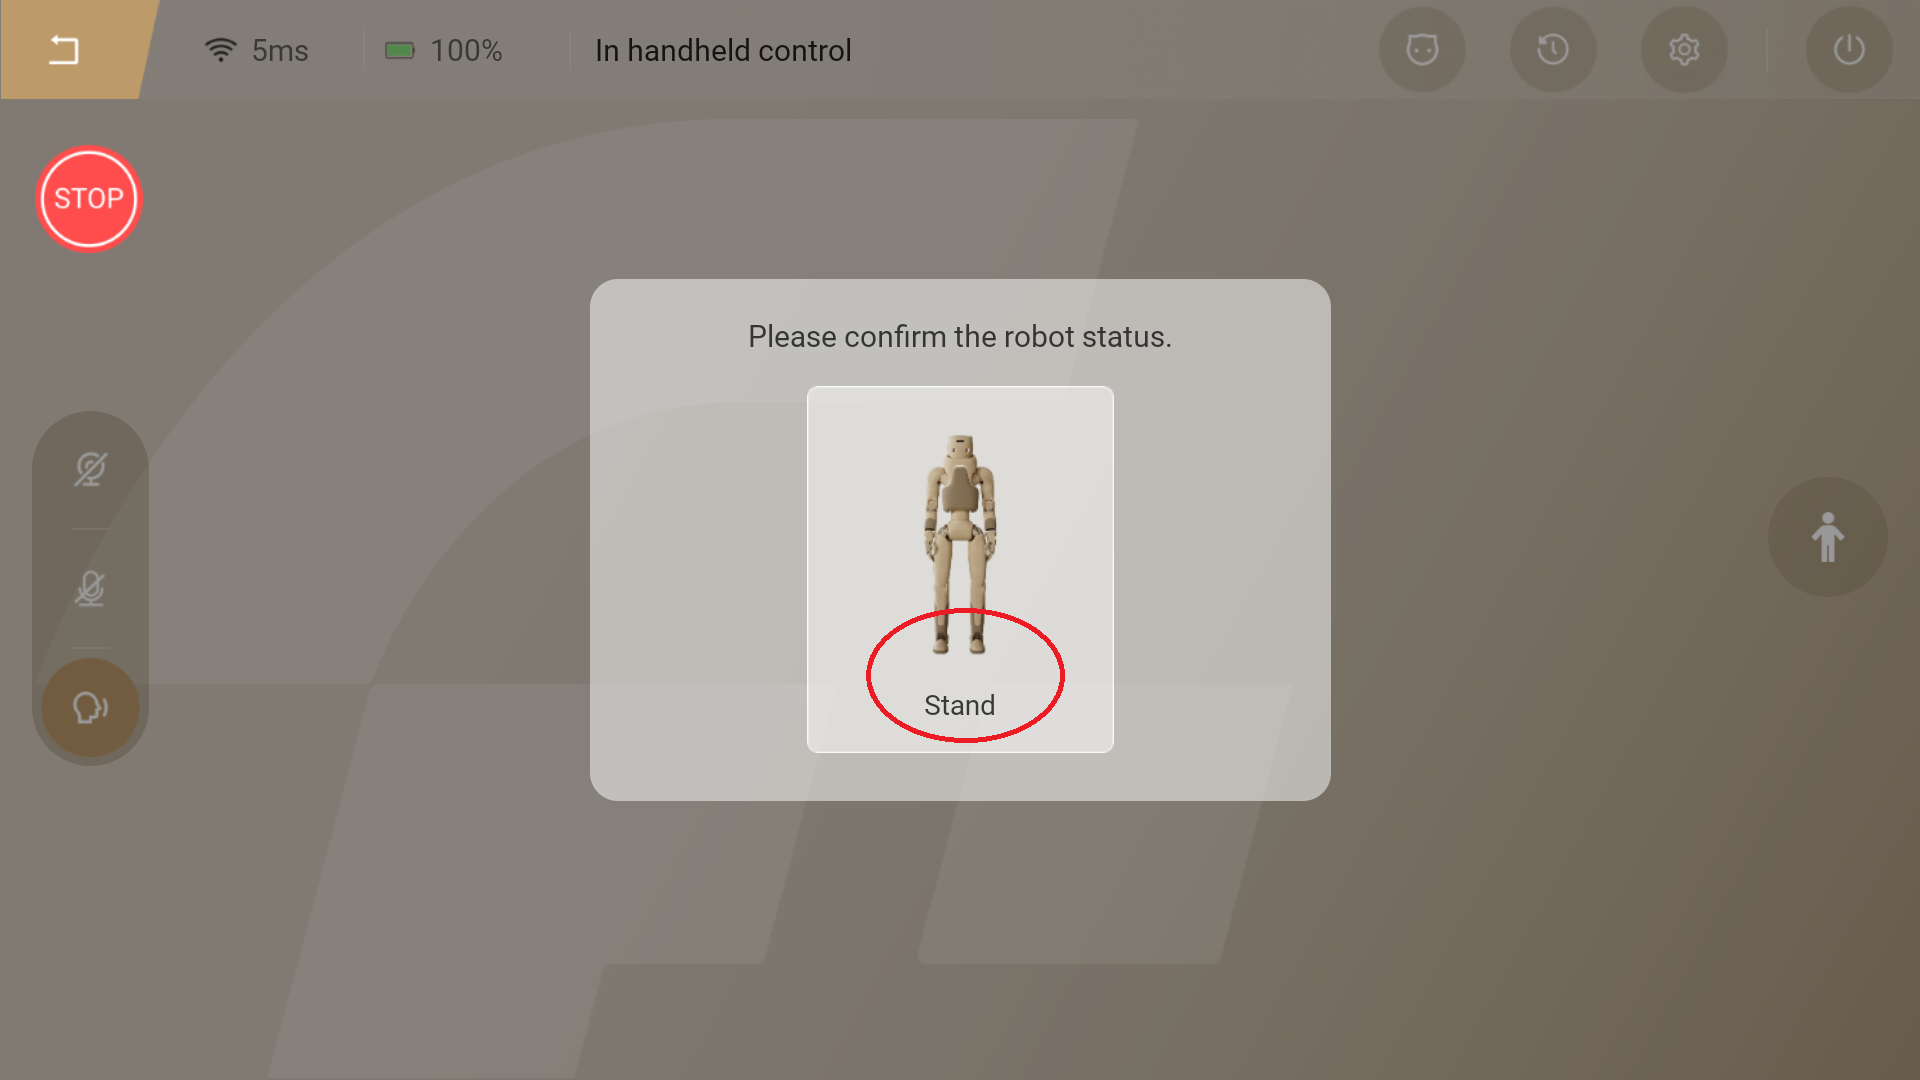
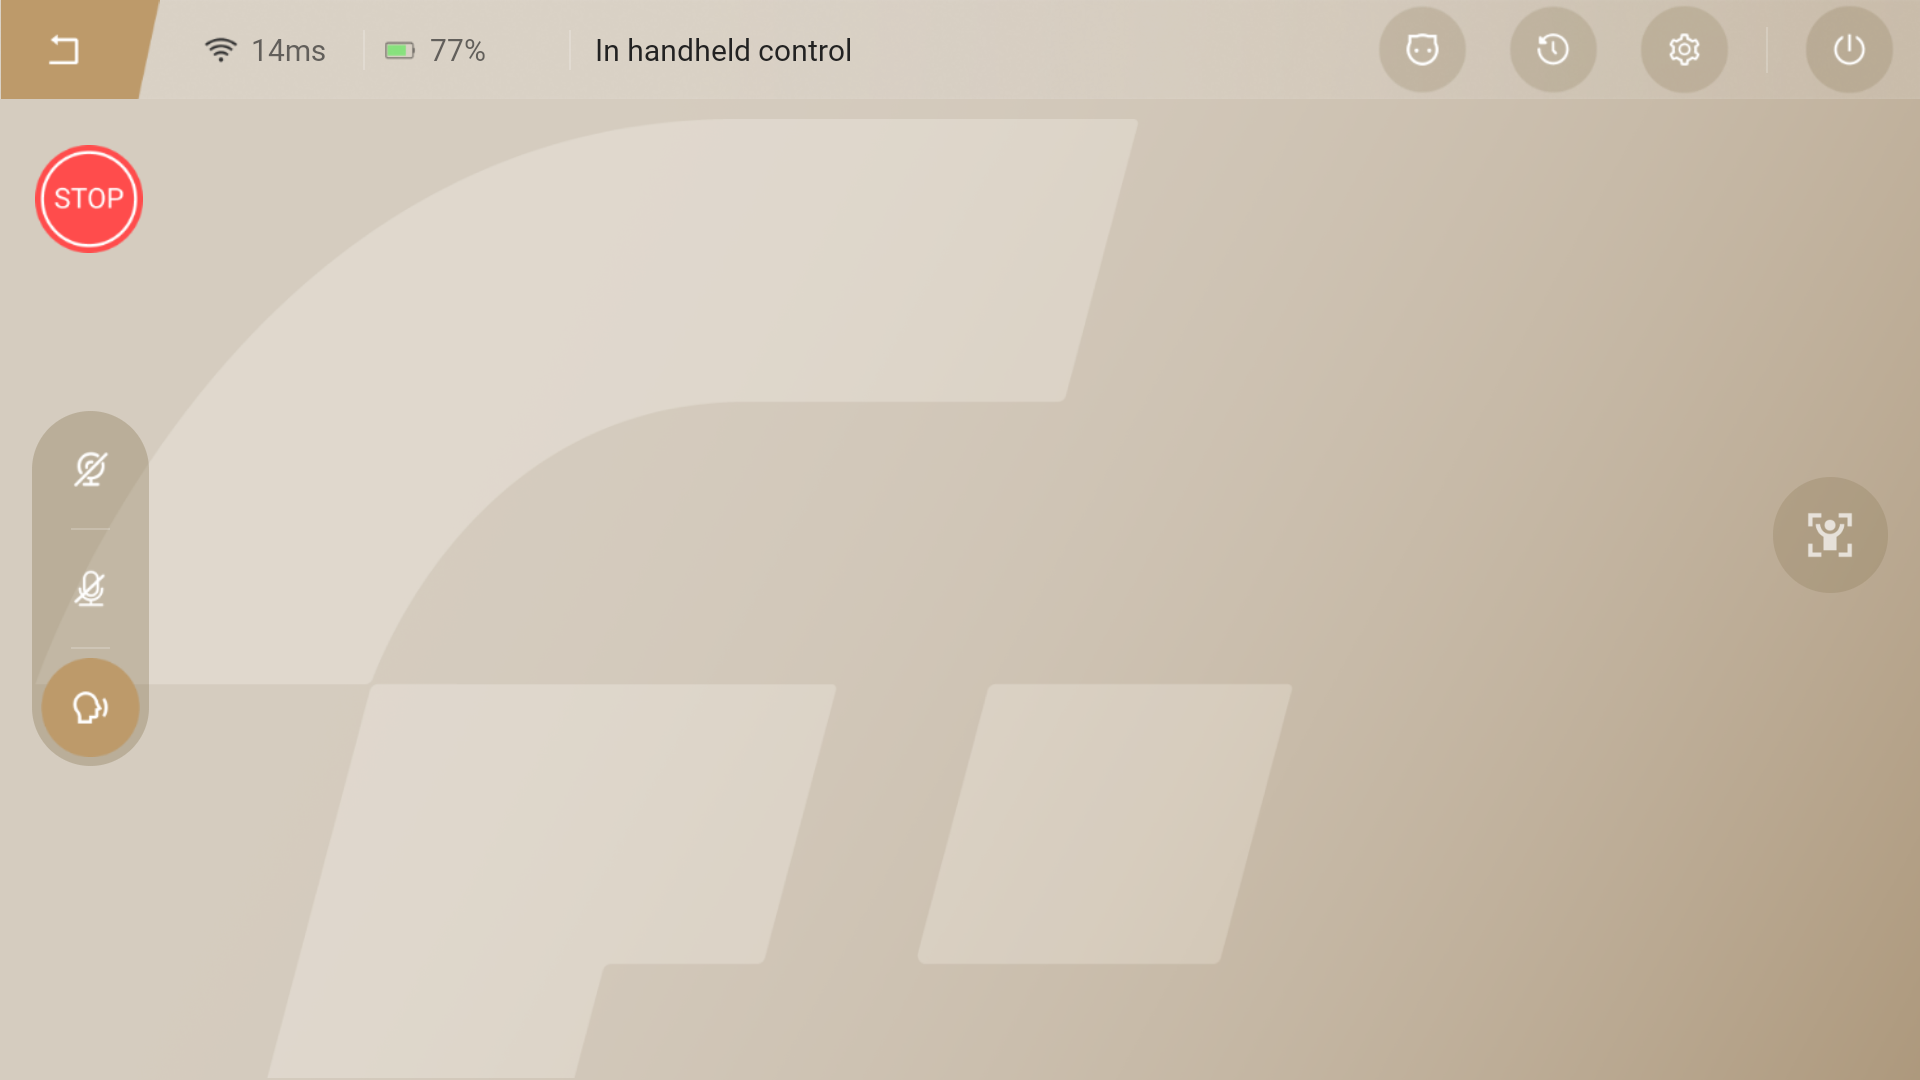
- After the startup is completed, the robot's actuators are enabled and the following interface are displayed on the handheld controller.
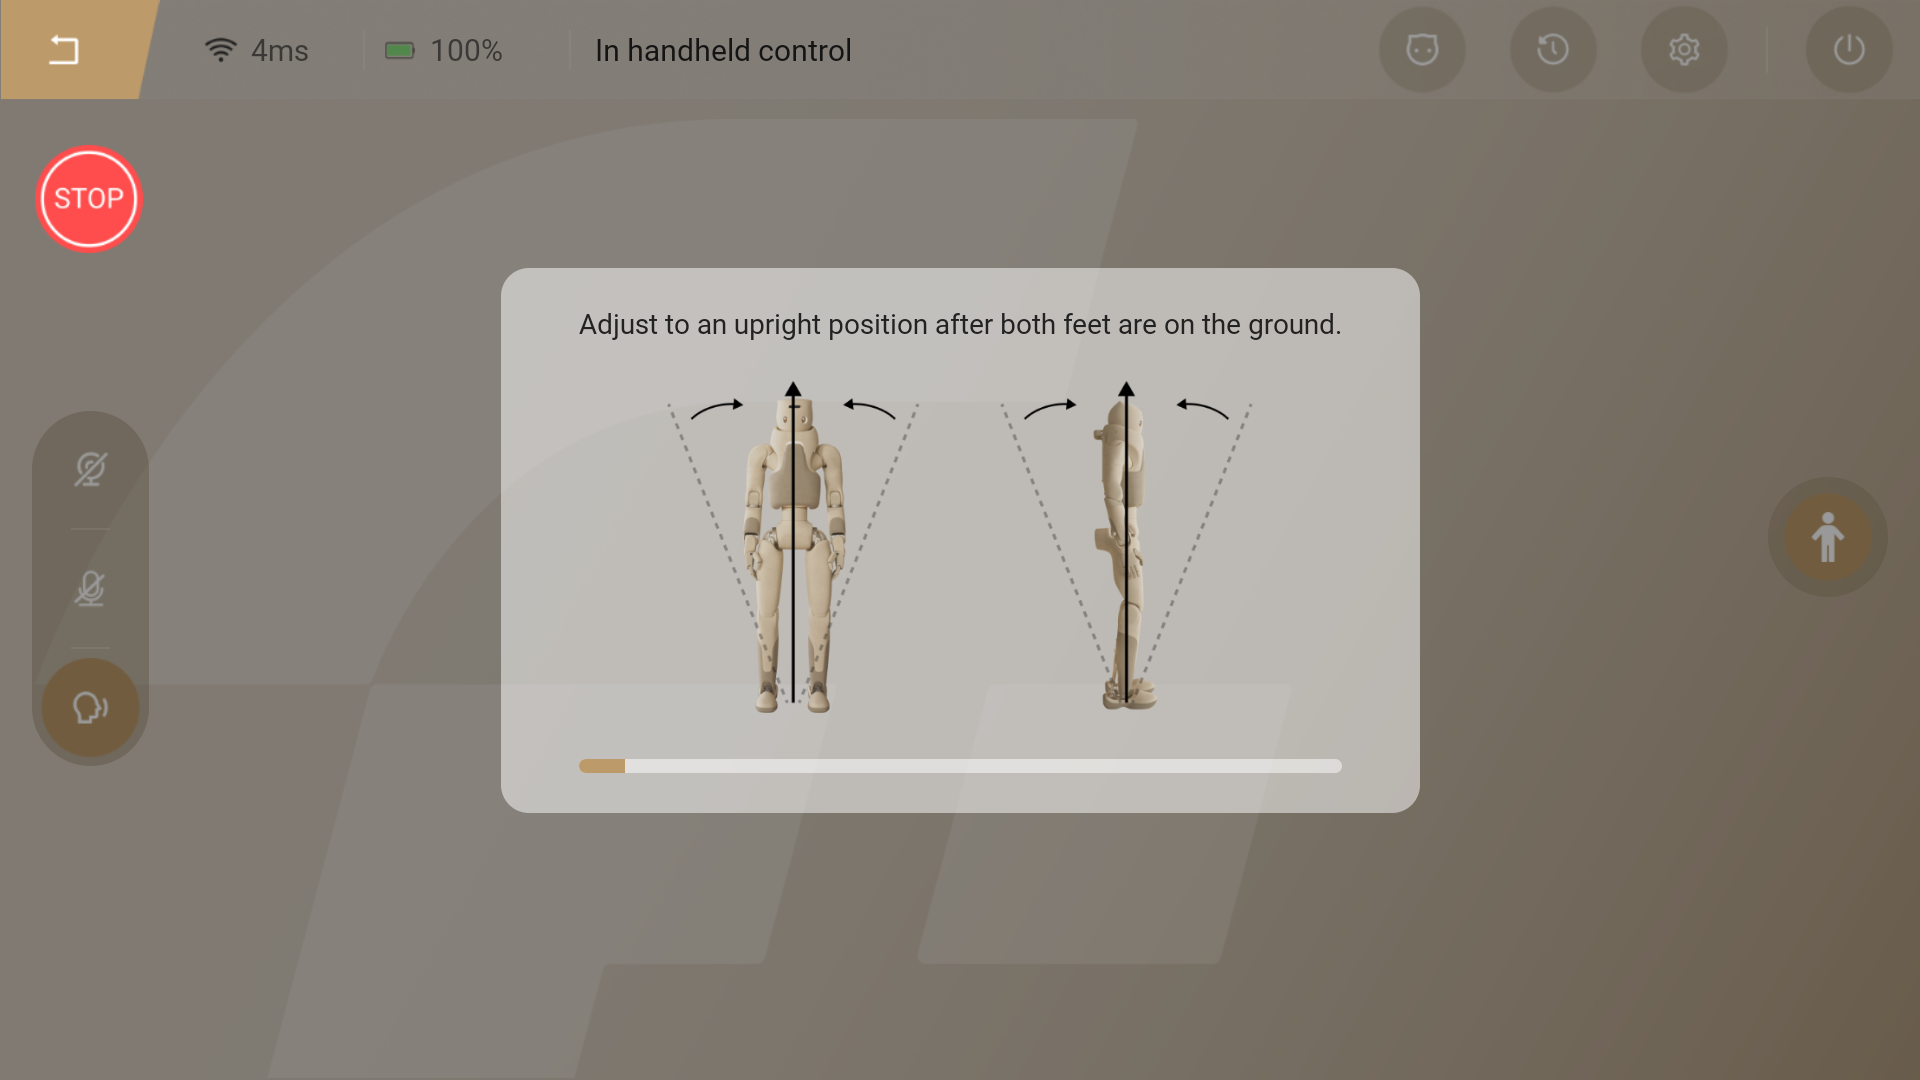
Enter Standing Mode
- After tapping the "Stand" button, use the shifter to control the robot to descend slowly. Once both feet of the robot touch the ground, adjust the robot's posture to ensure it stands steadily and enters the standing mode.
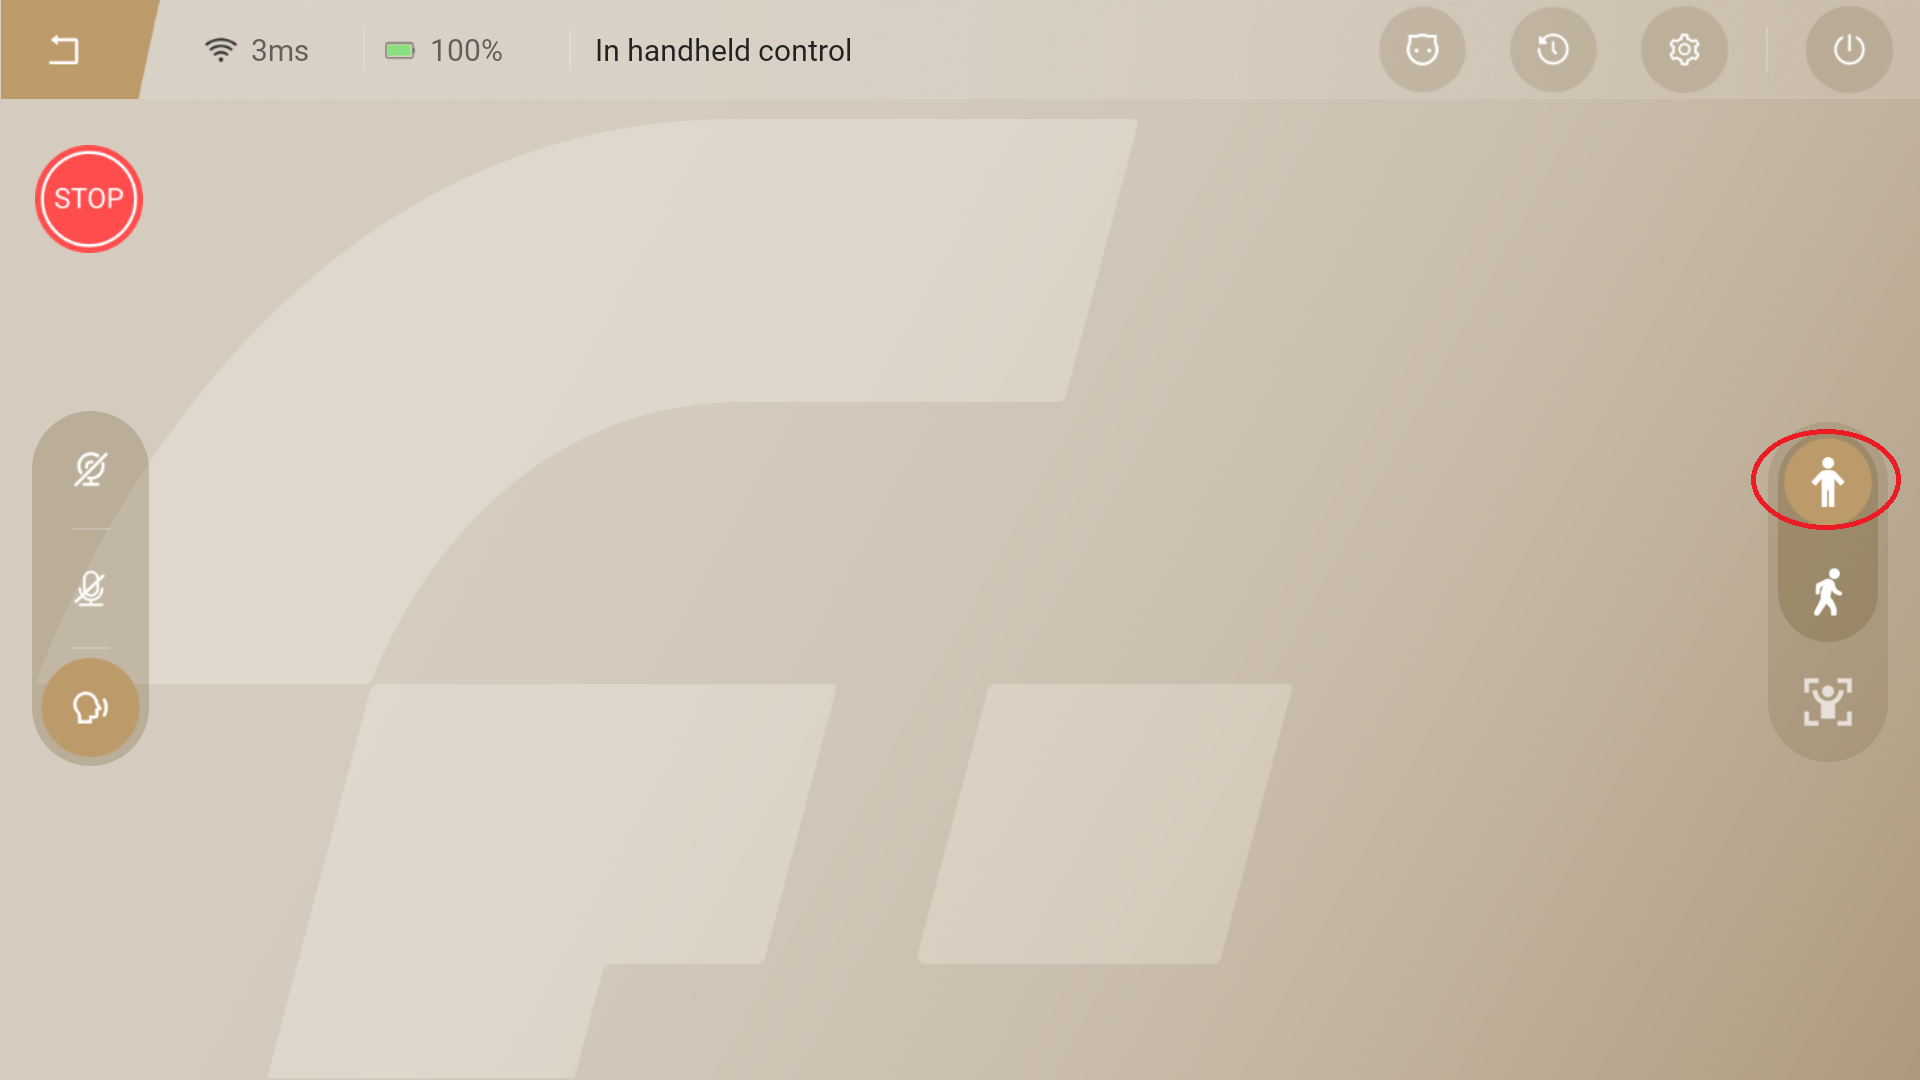
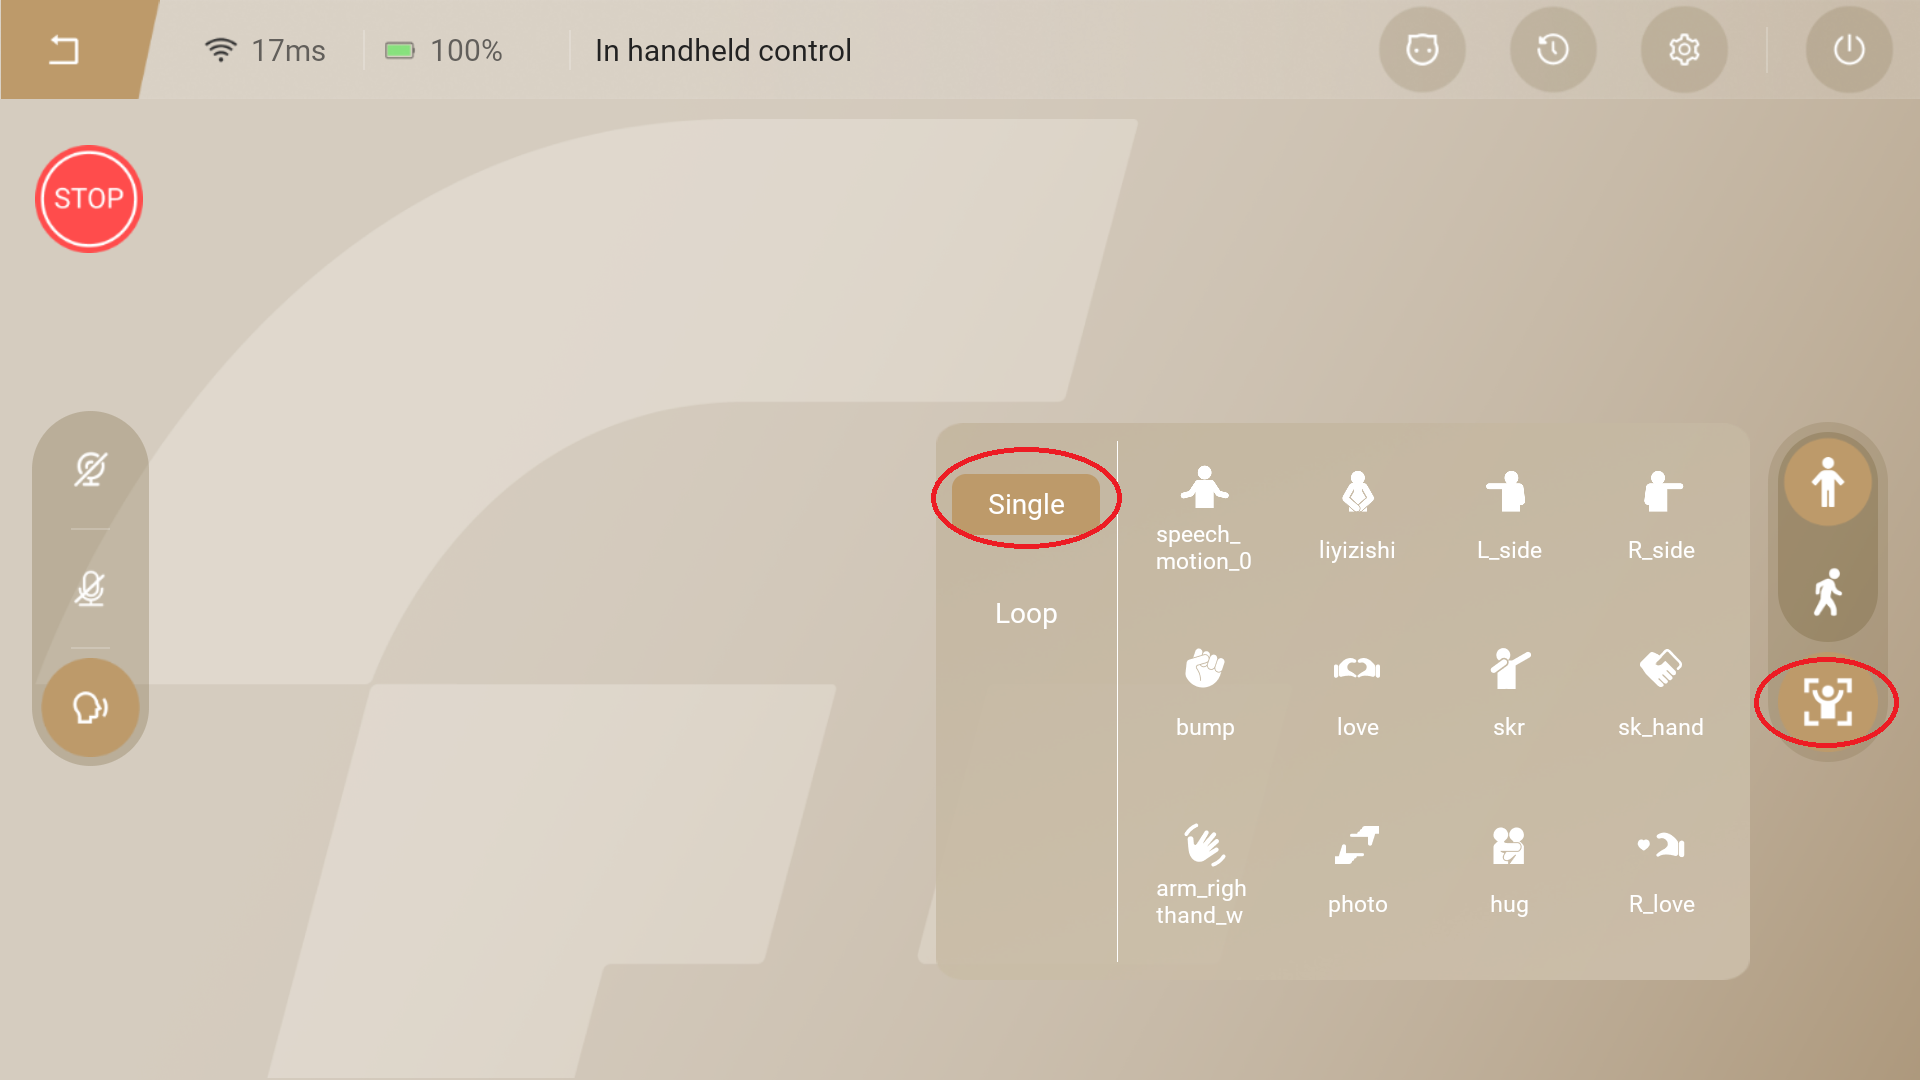
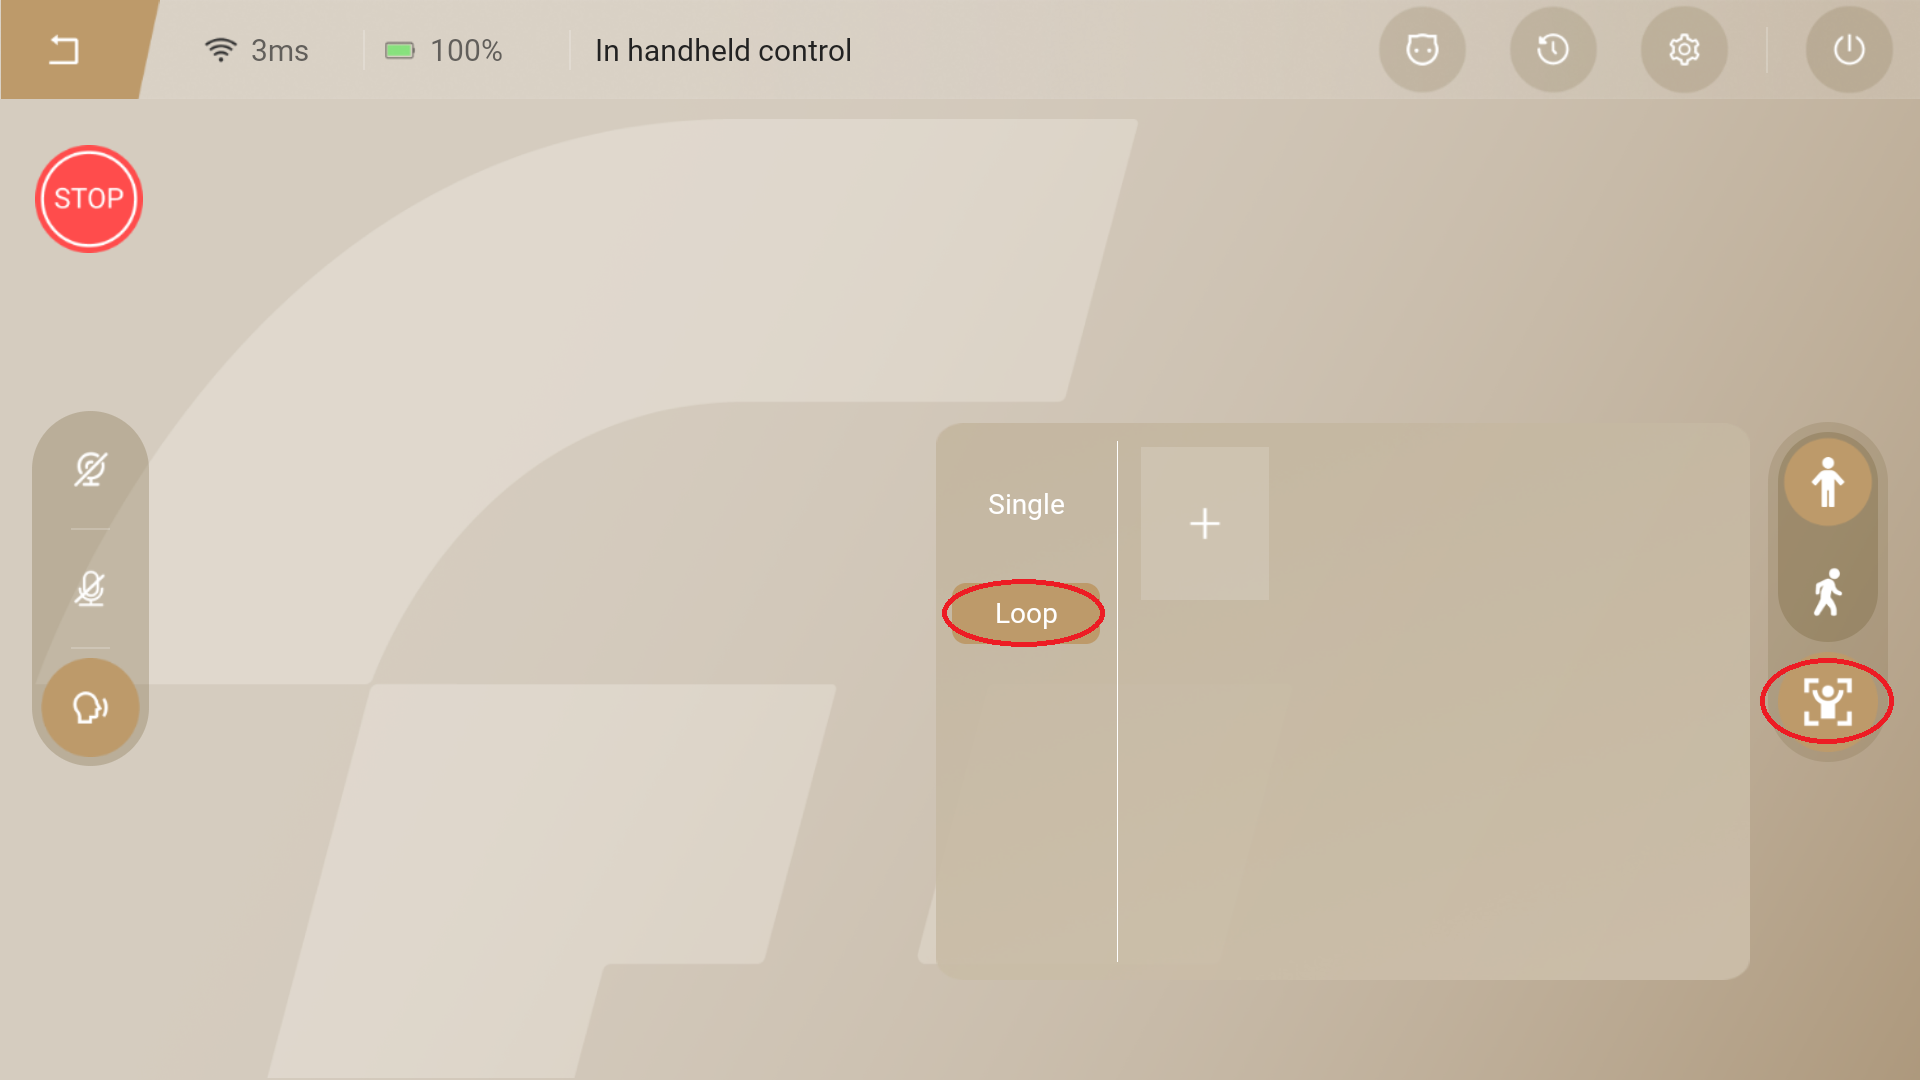
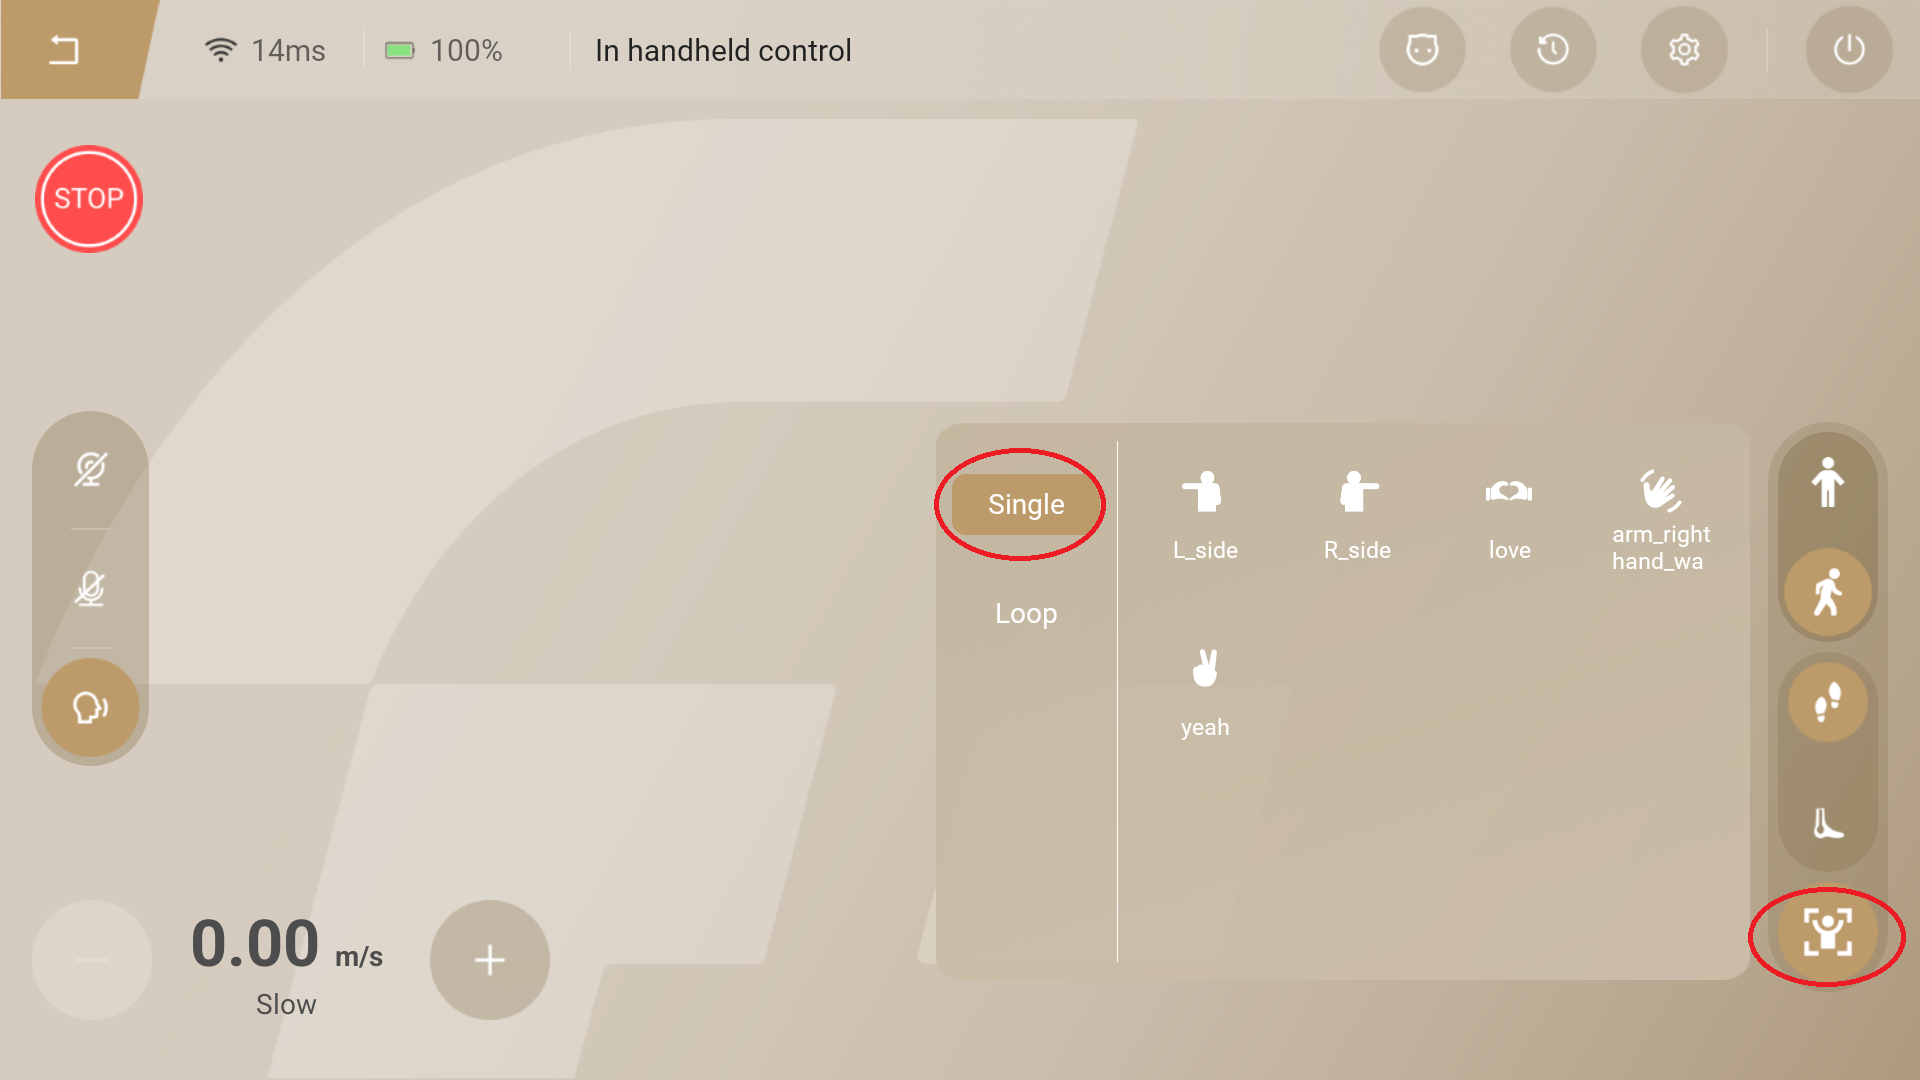
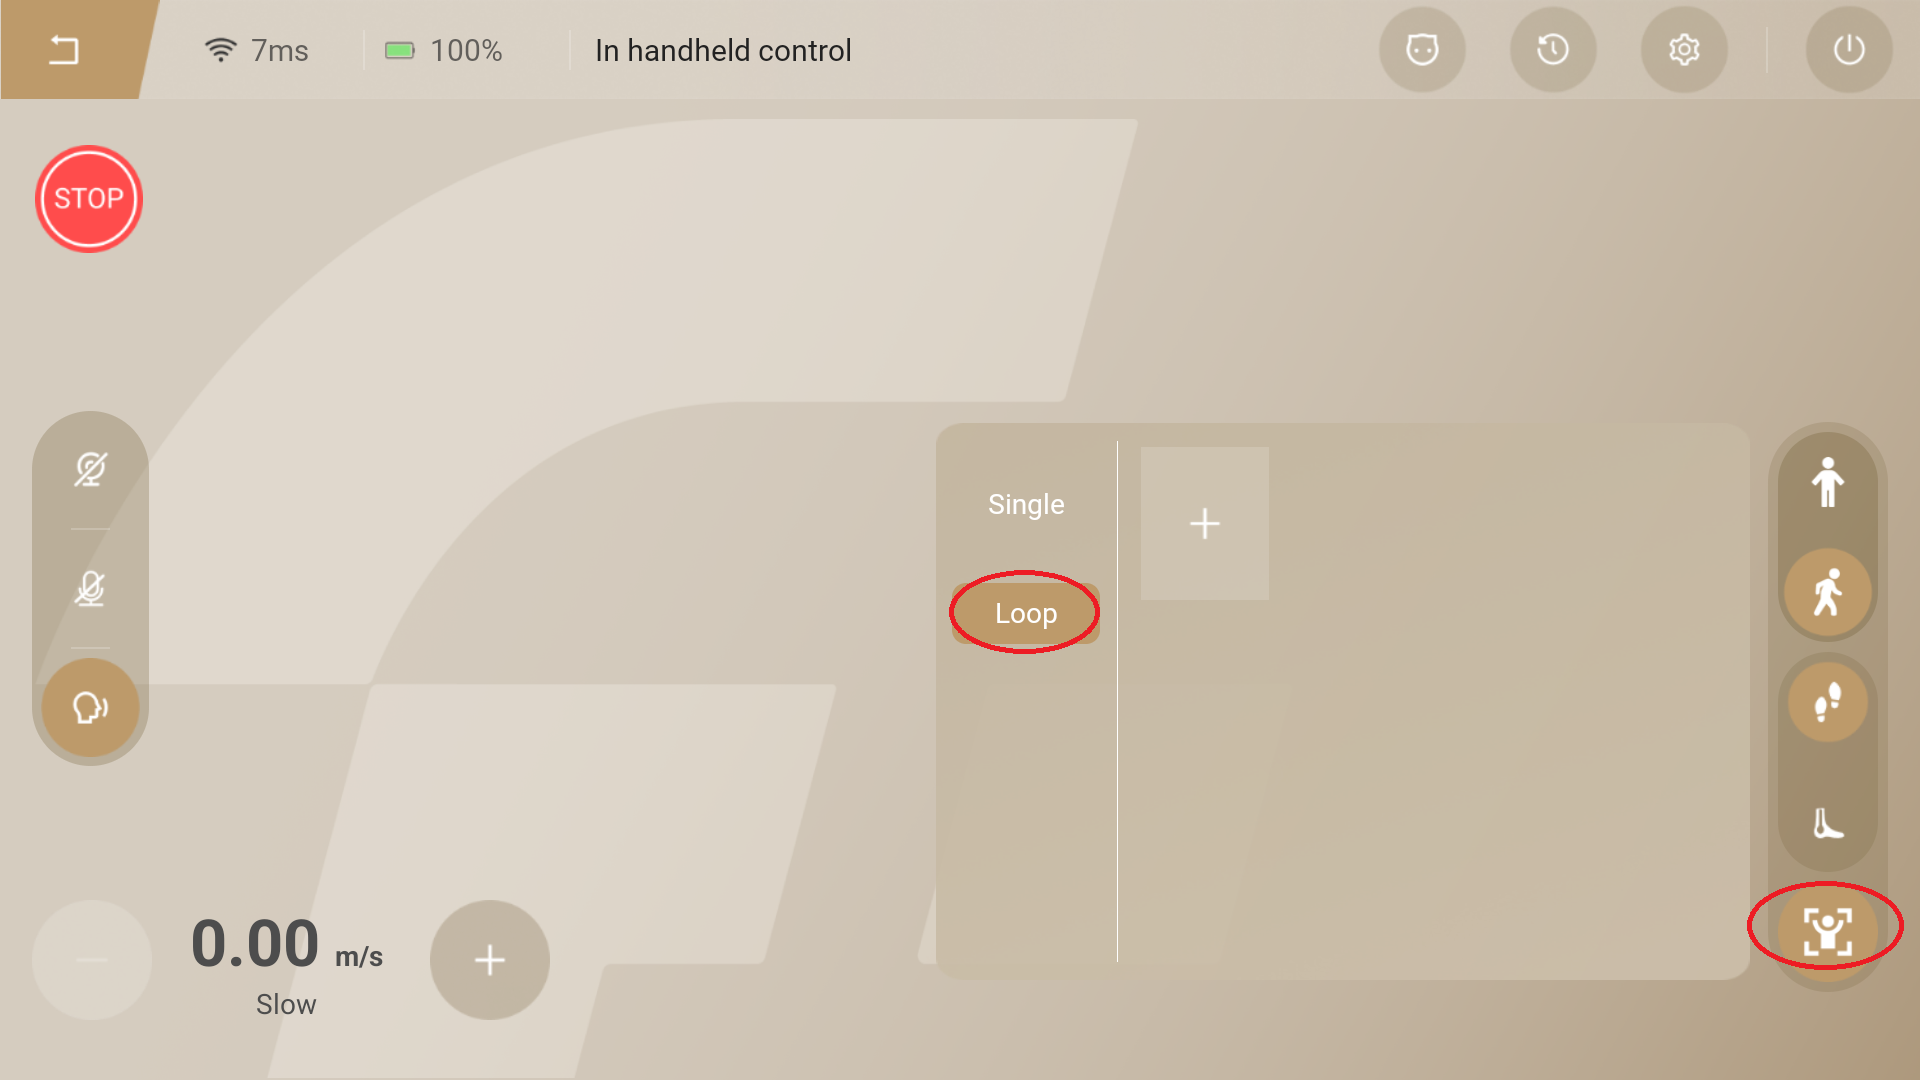
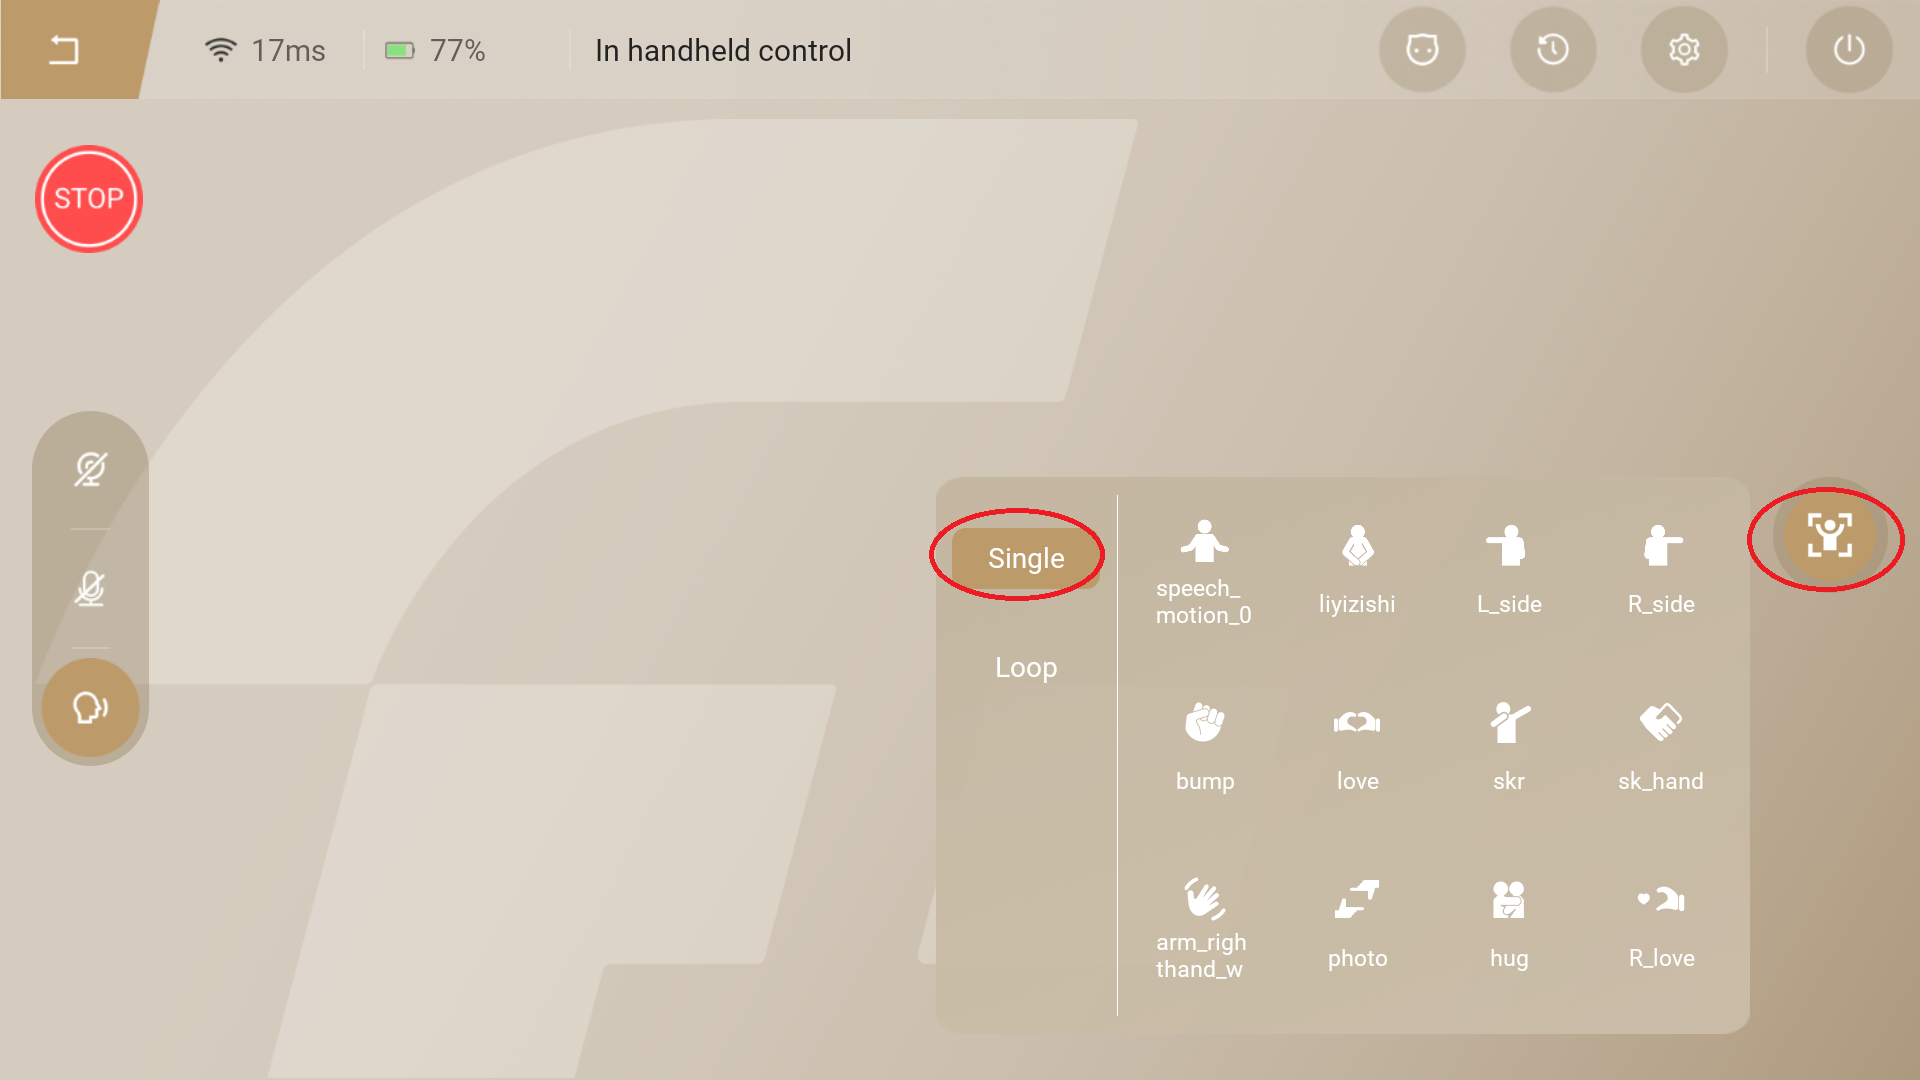
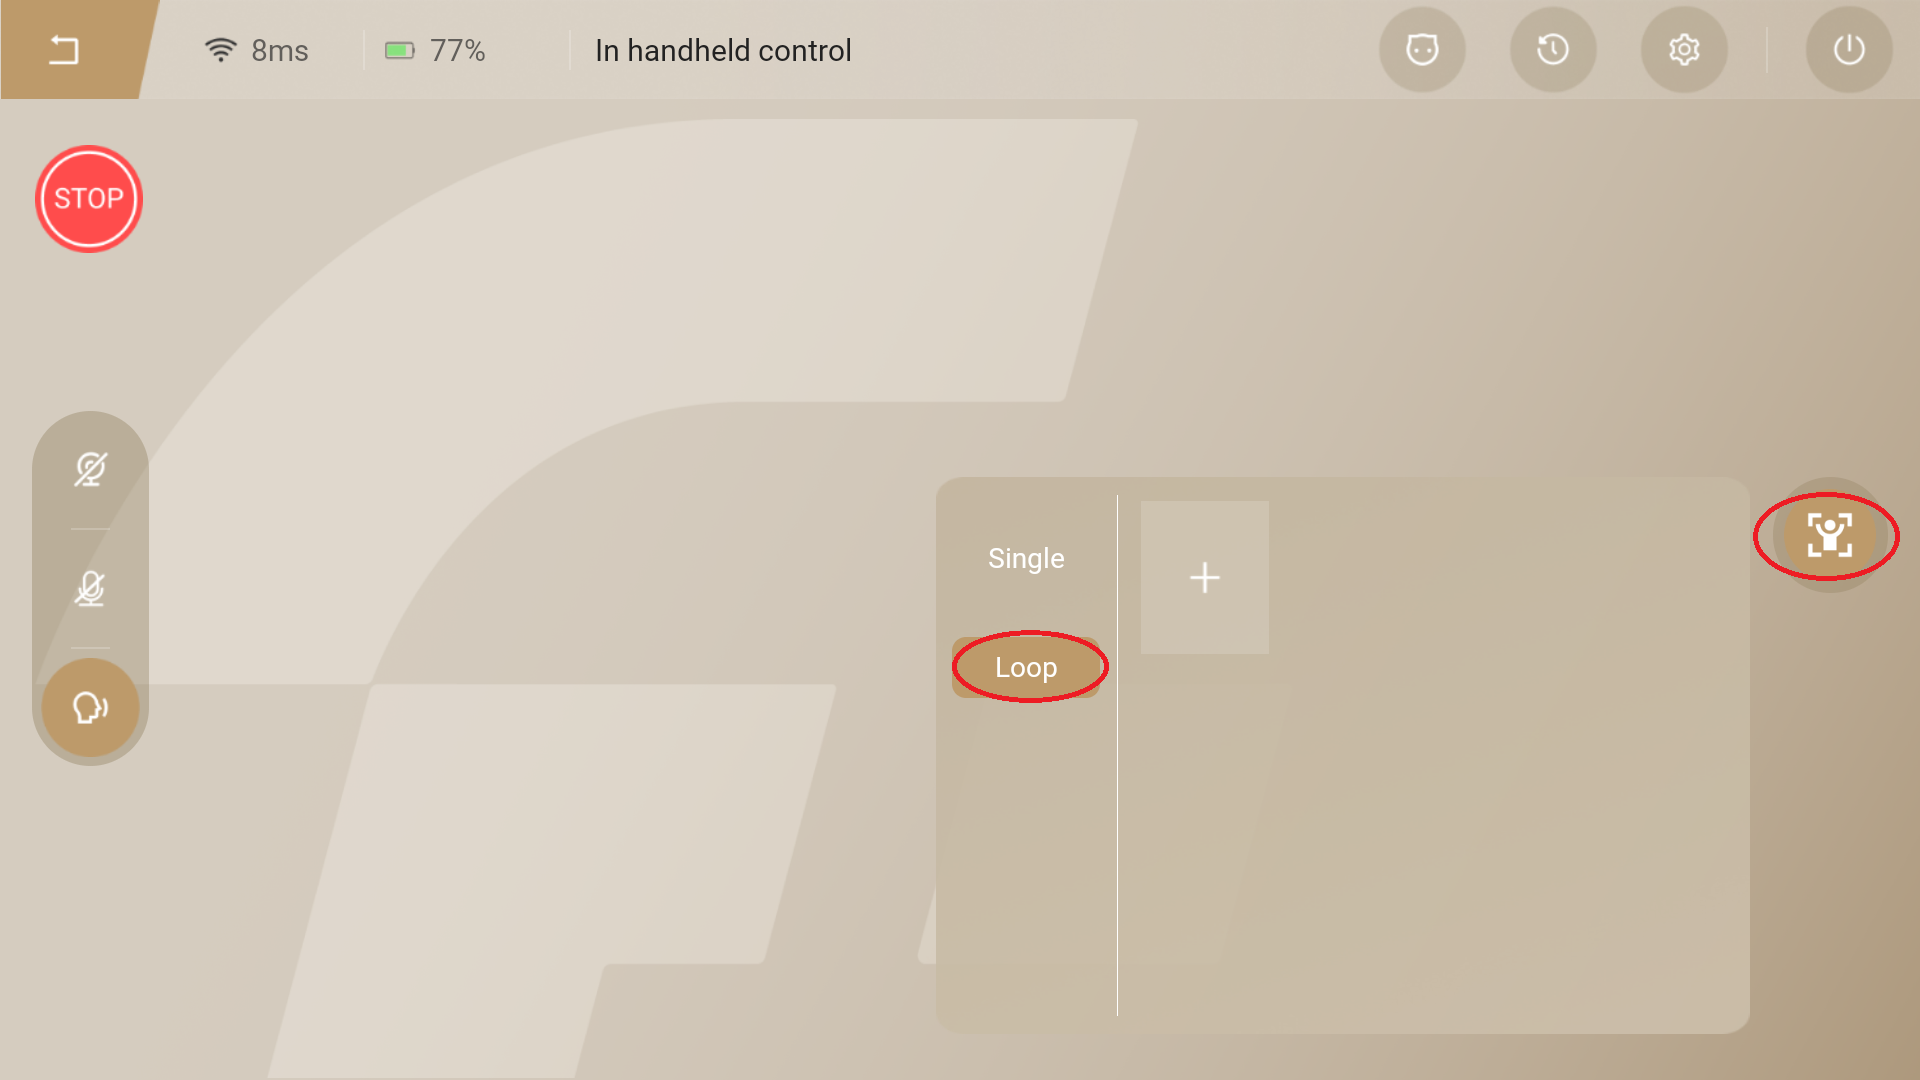
- In standing mode, use the right joystick on the handheld controller to control the robot's waist rotation or squatting up and down. Tapping the target "Single" actions button or adding "Loop" action groups can control the robot to perform corresponding actions.
Tap the "Standby" button to enter standby mode, where the robot automatically plays random standby actions.

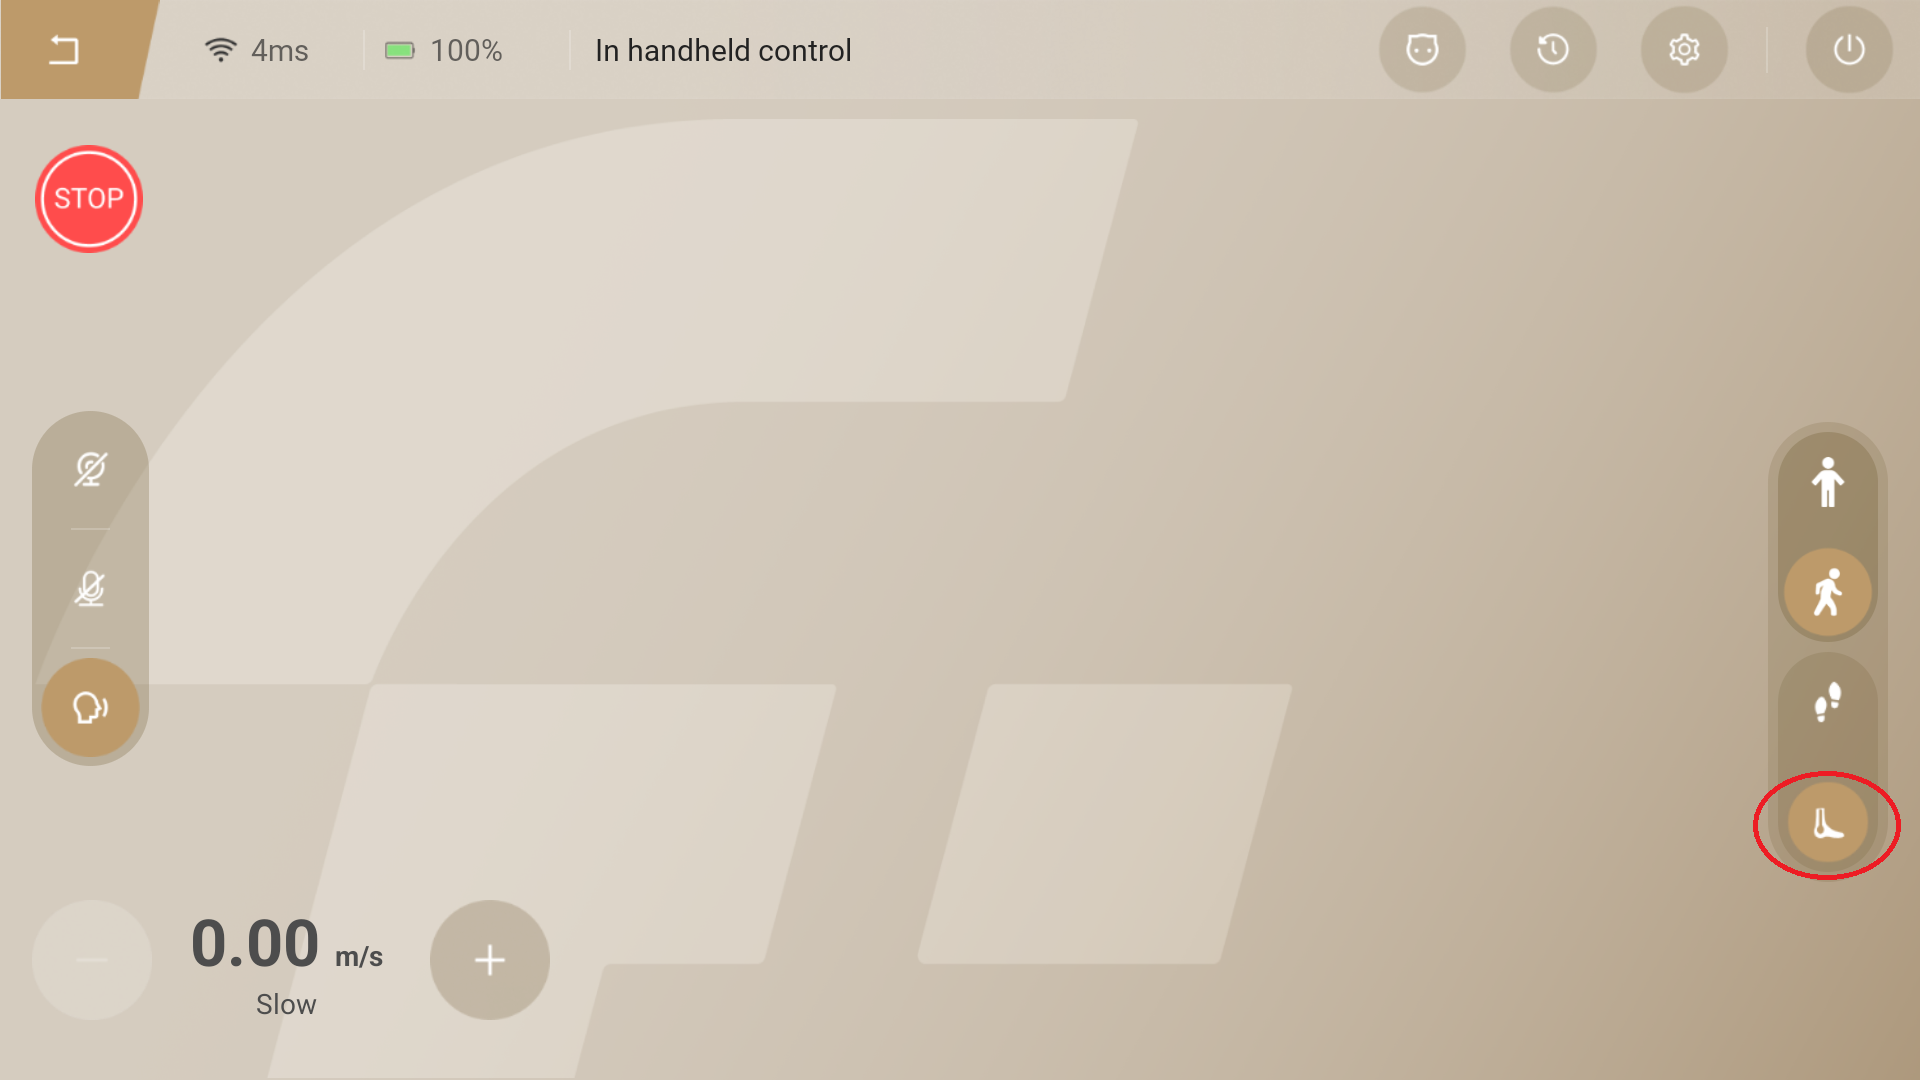
Enter Walking Mode
- In the standing mode, tapping the "Walk" button switches to the walking mode.By default, entering non-anthropomorphic gaits walking mode, use the left joystick on the handheld controller to control the robot's forward and backward movement, and the right joystick to control left/right turning.
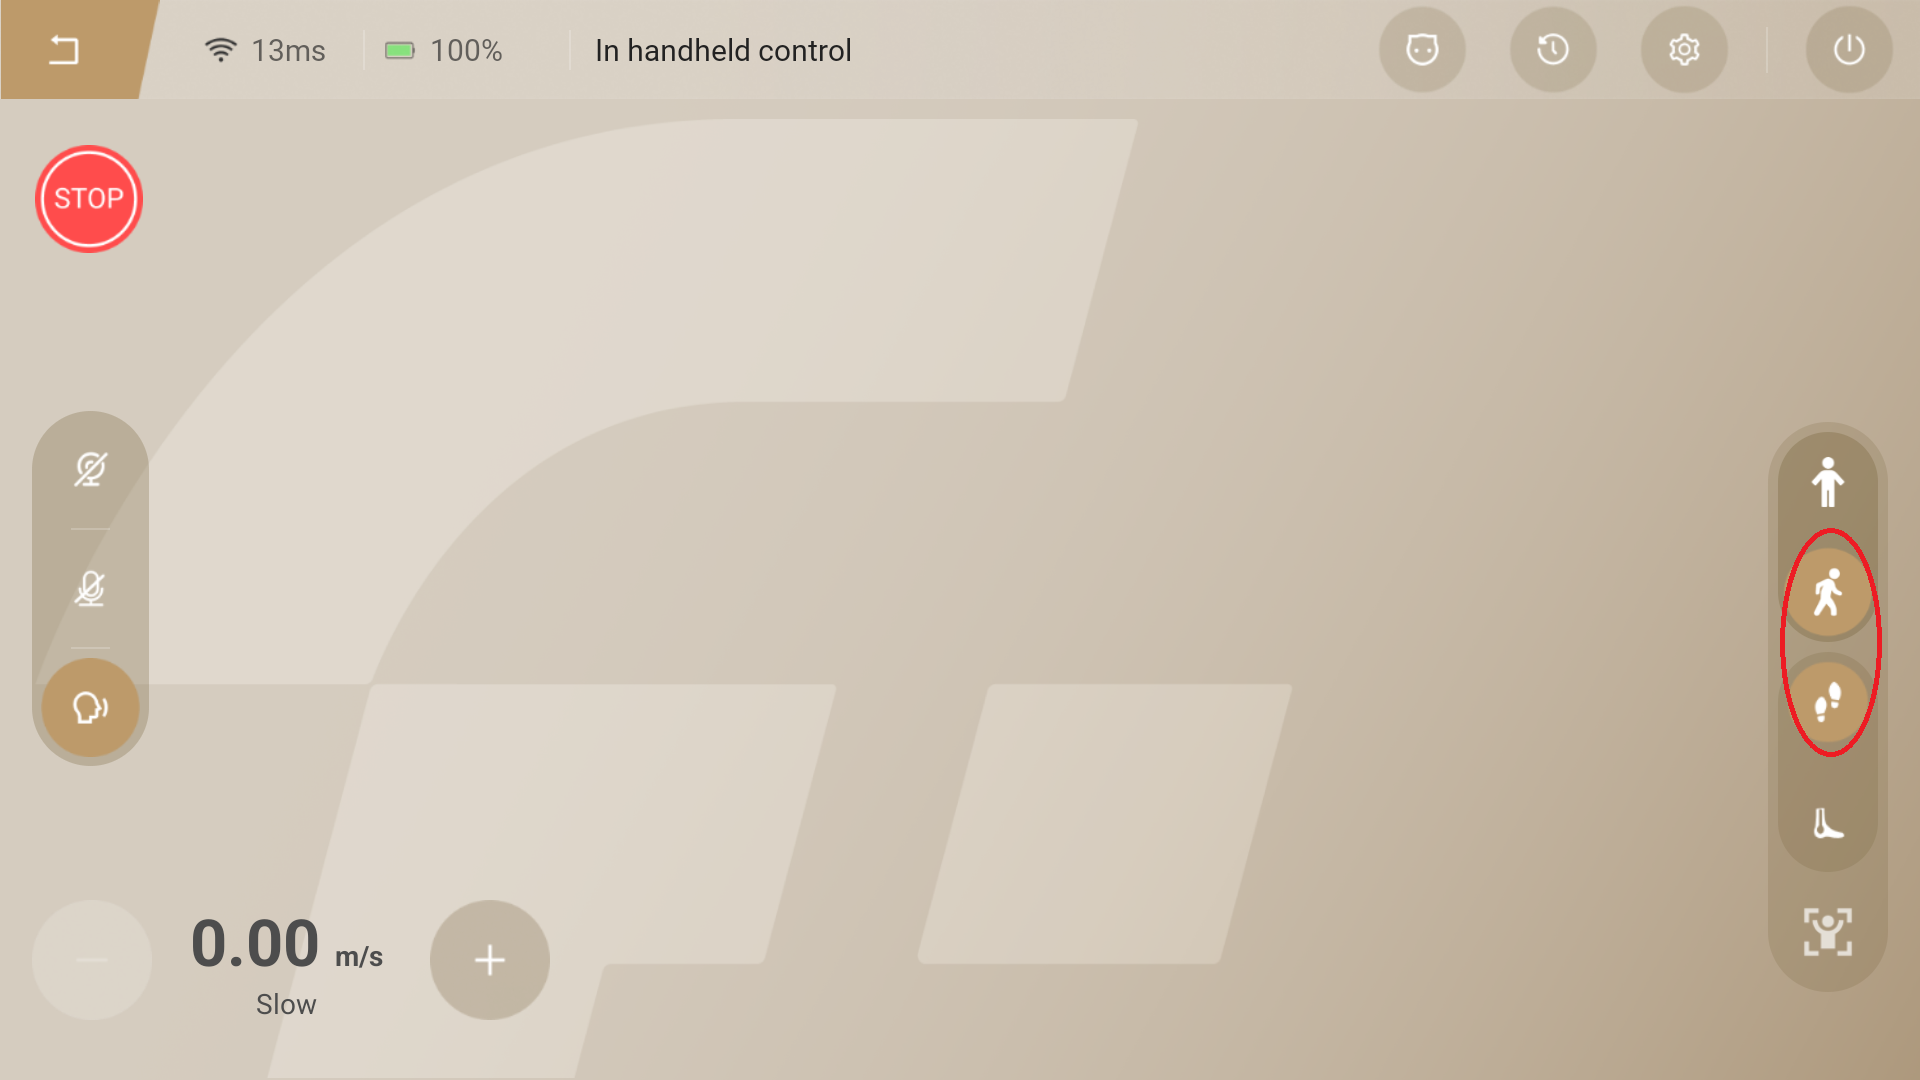
- Tapping the target "Single" actions button or adding custom cyclic action groups can control the robot to perform corresponding actions.
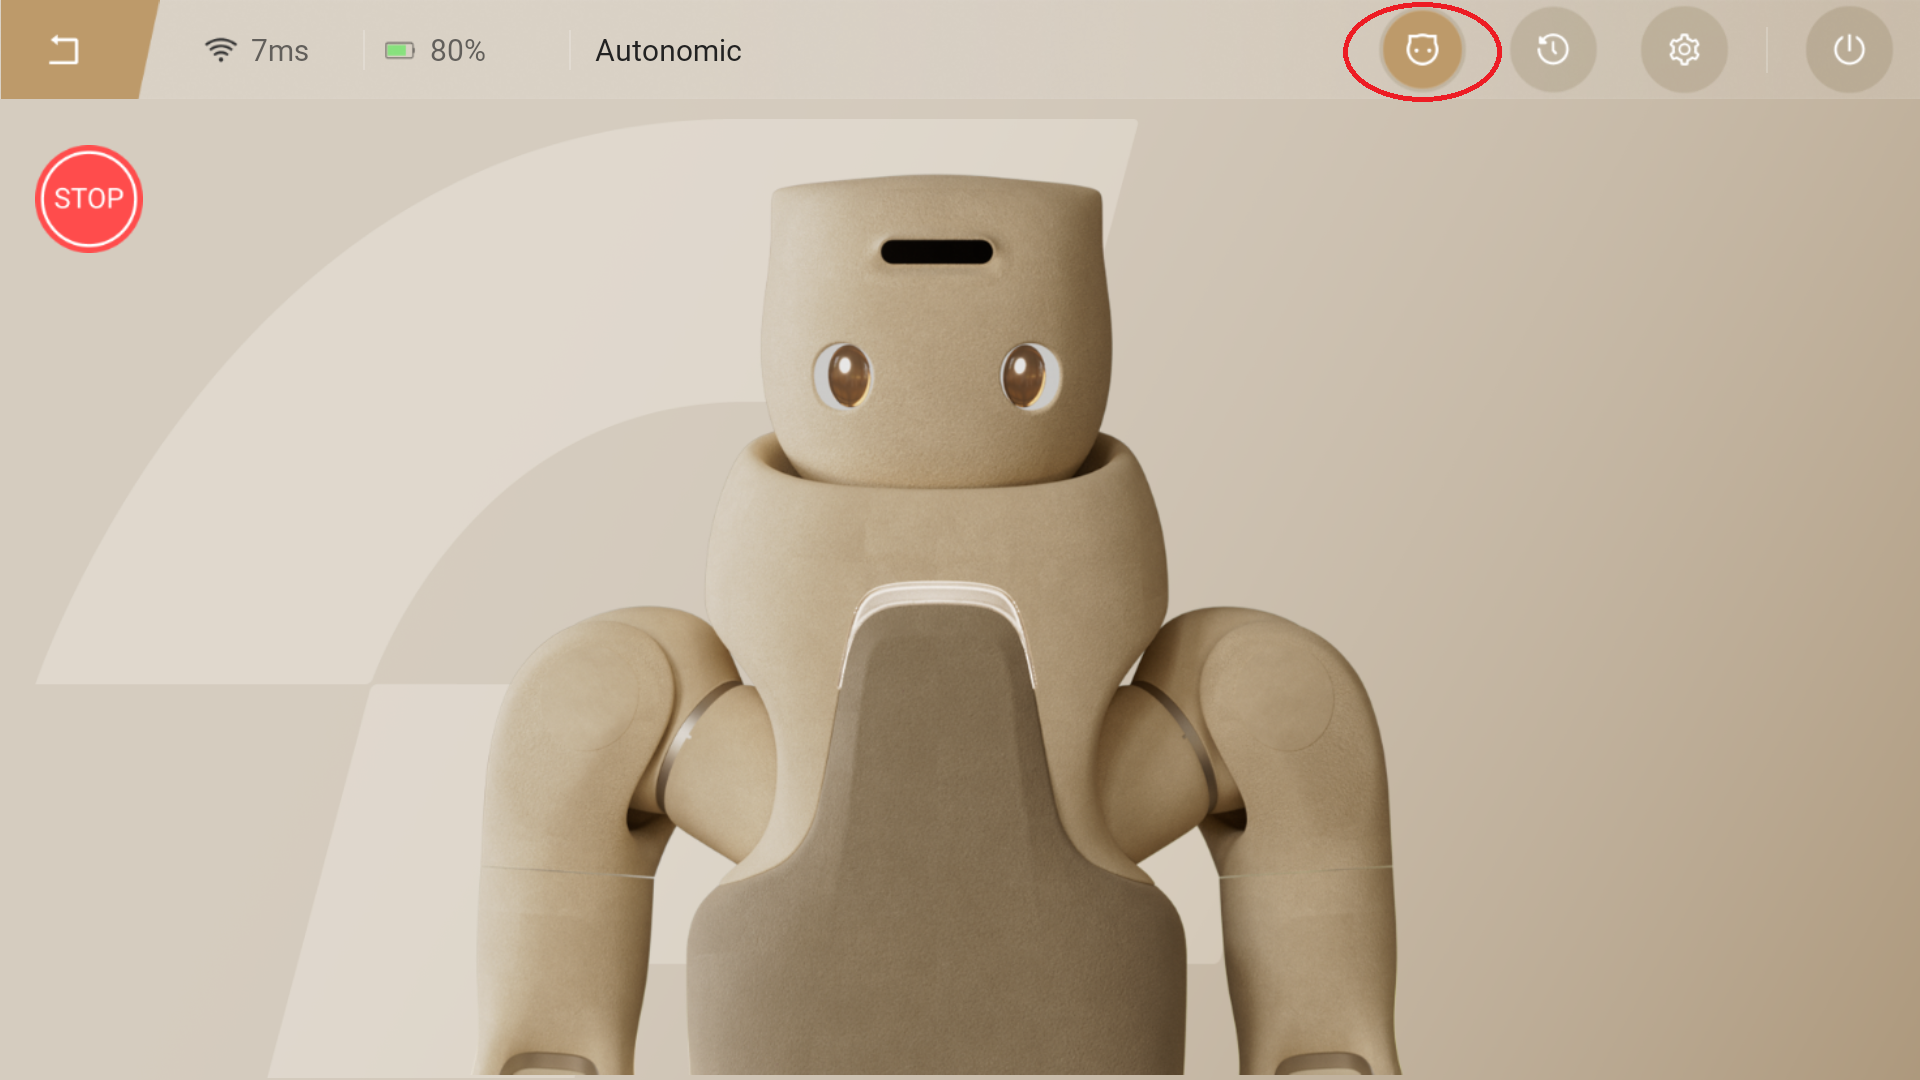
- Tapping the "Touch Interaction" button activates the robot's autonomous mode. And in this mode, the robot will trigger a touch interaction when touch the top of robot's head, left or right cheek, or front chest panel. Tap the "Standby" button to enter standby mode, where the robot automatically plays random standby actions.
- Tapping the "Anthropomorphic Gait" button will switch to anthropomorphic walking mode. In this mode, use the left joystick on the handheld controller to control the robot's forward and backward movement, and the right joystick to control left/right turning.
Mode Switching
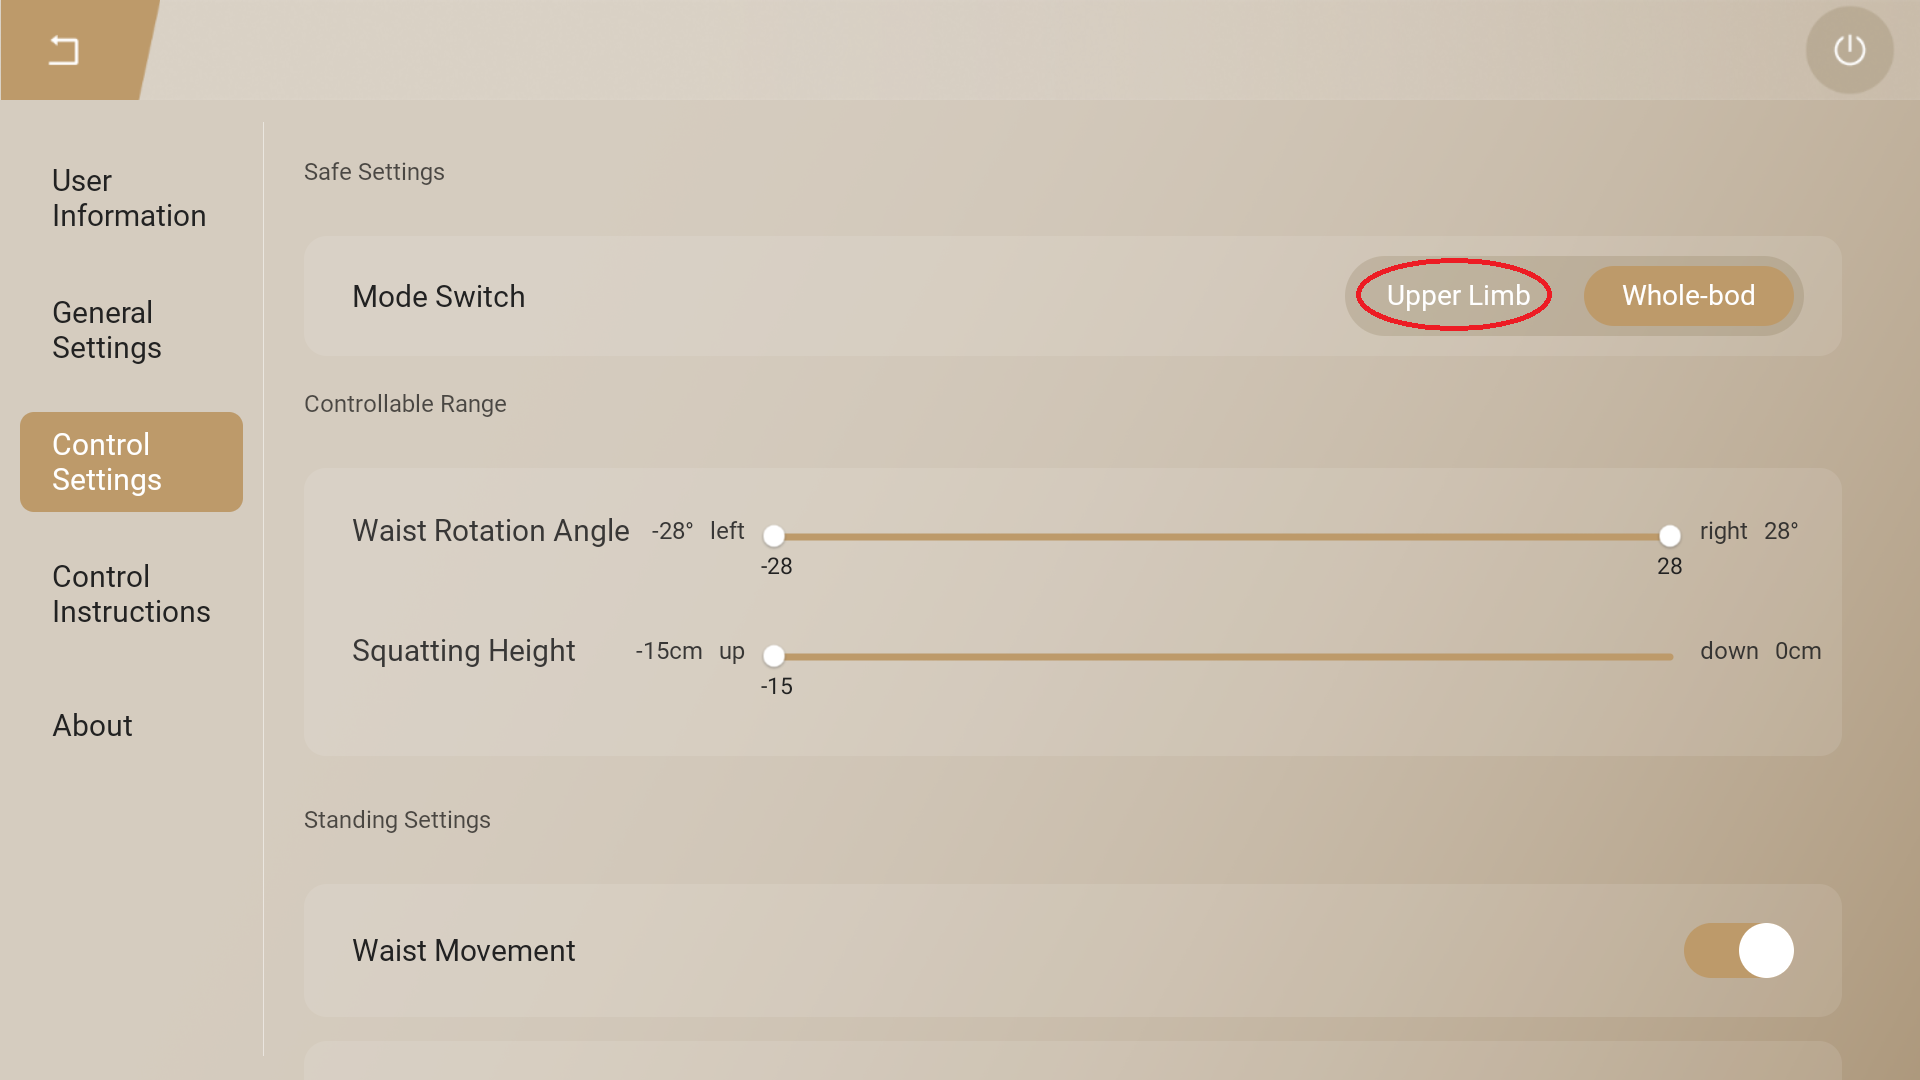
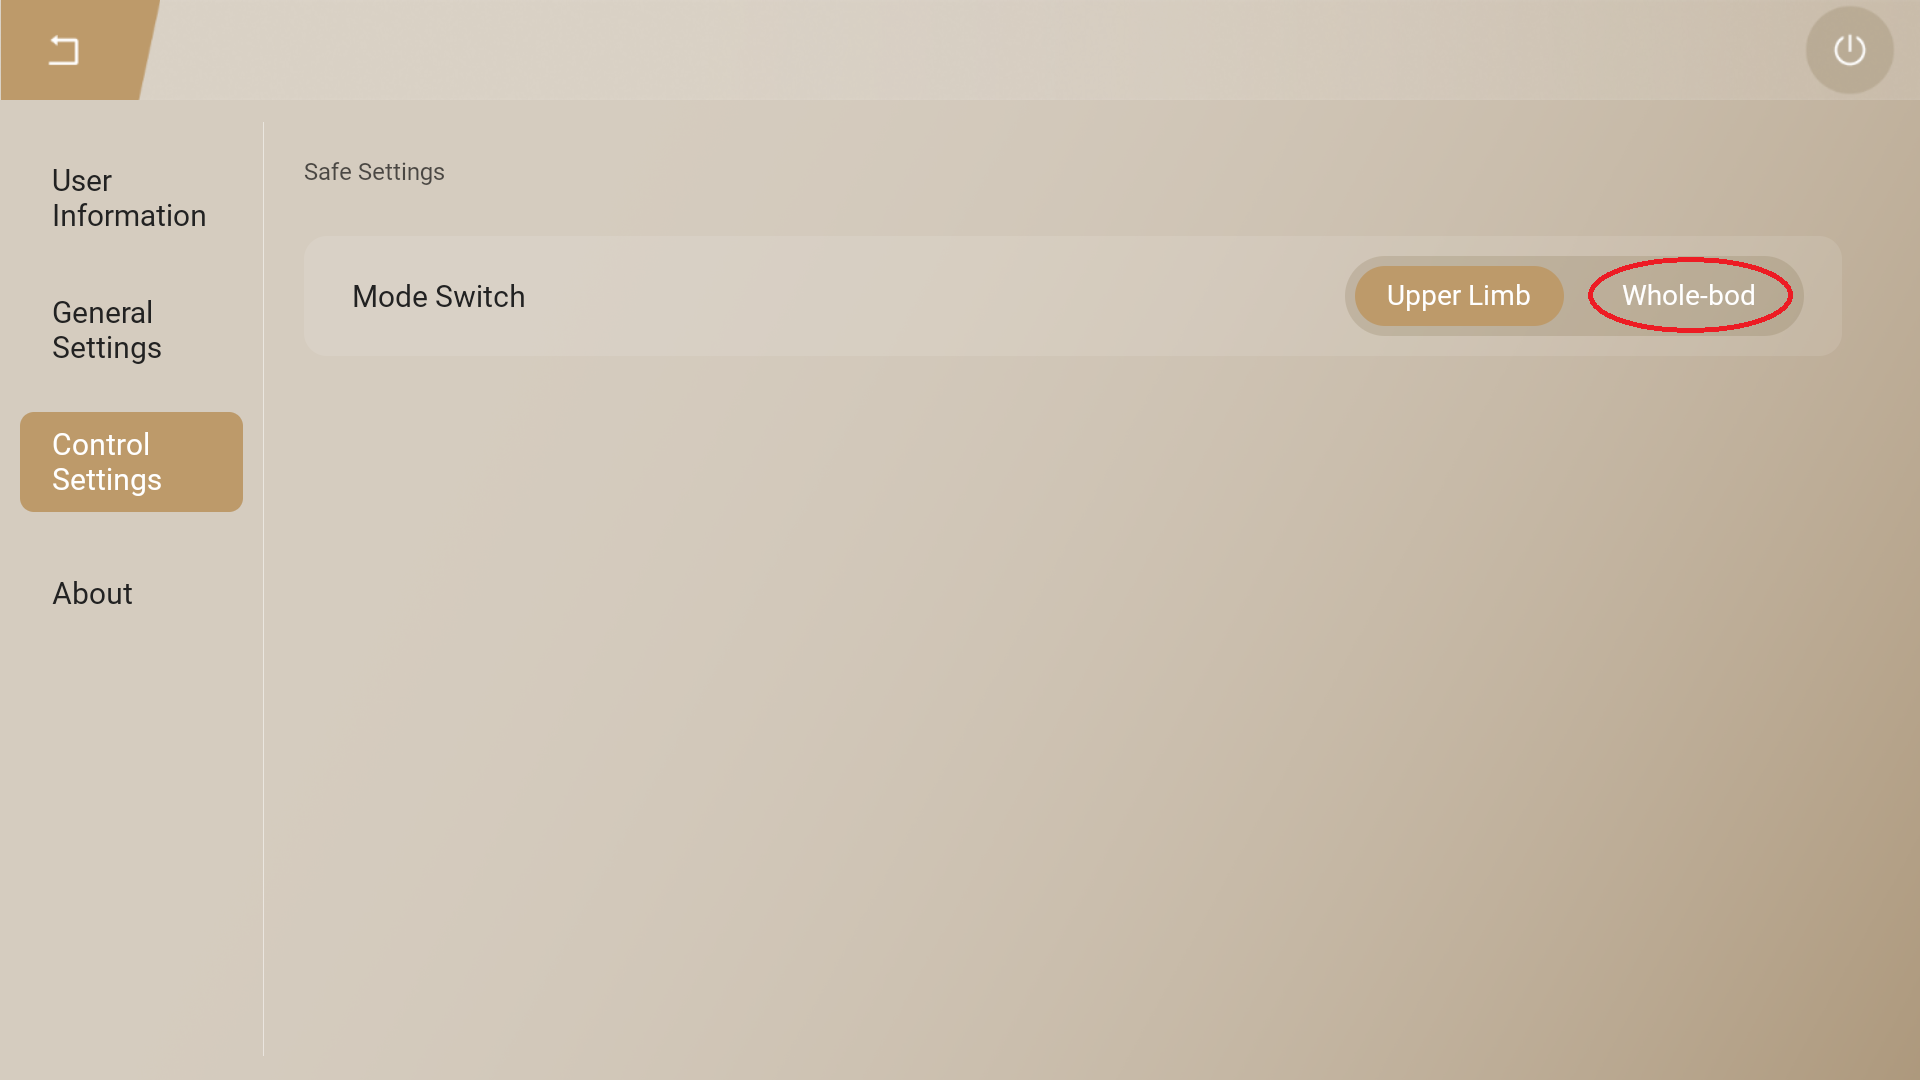
On the "Settings" → "Control Settings" → "Mode Switch" page, the switching operation between Whole Body Mode and Upper Body Mode can be performed.
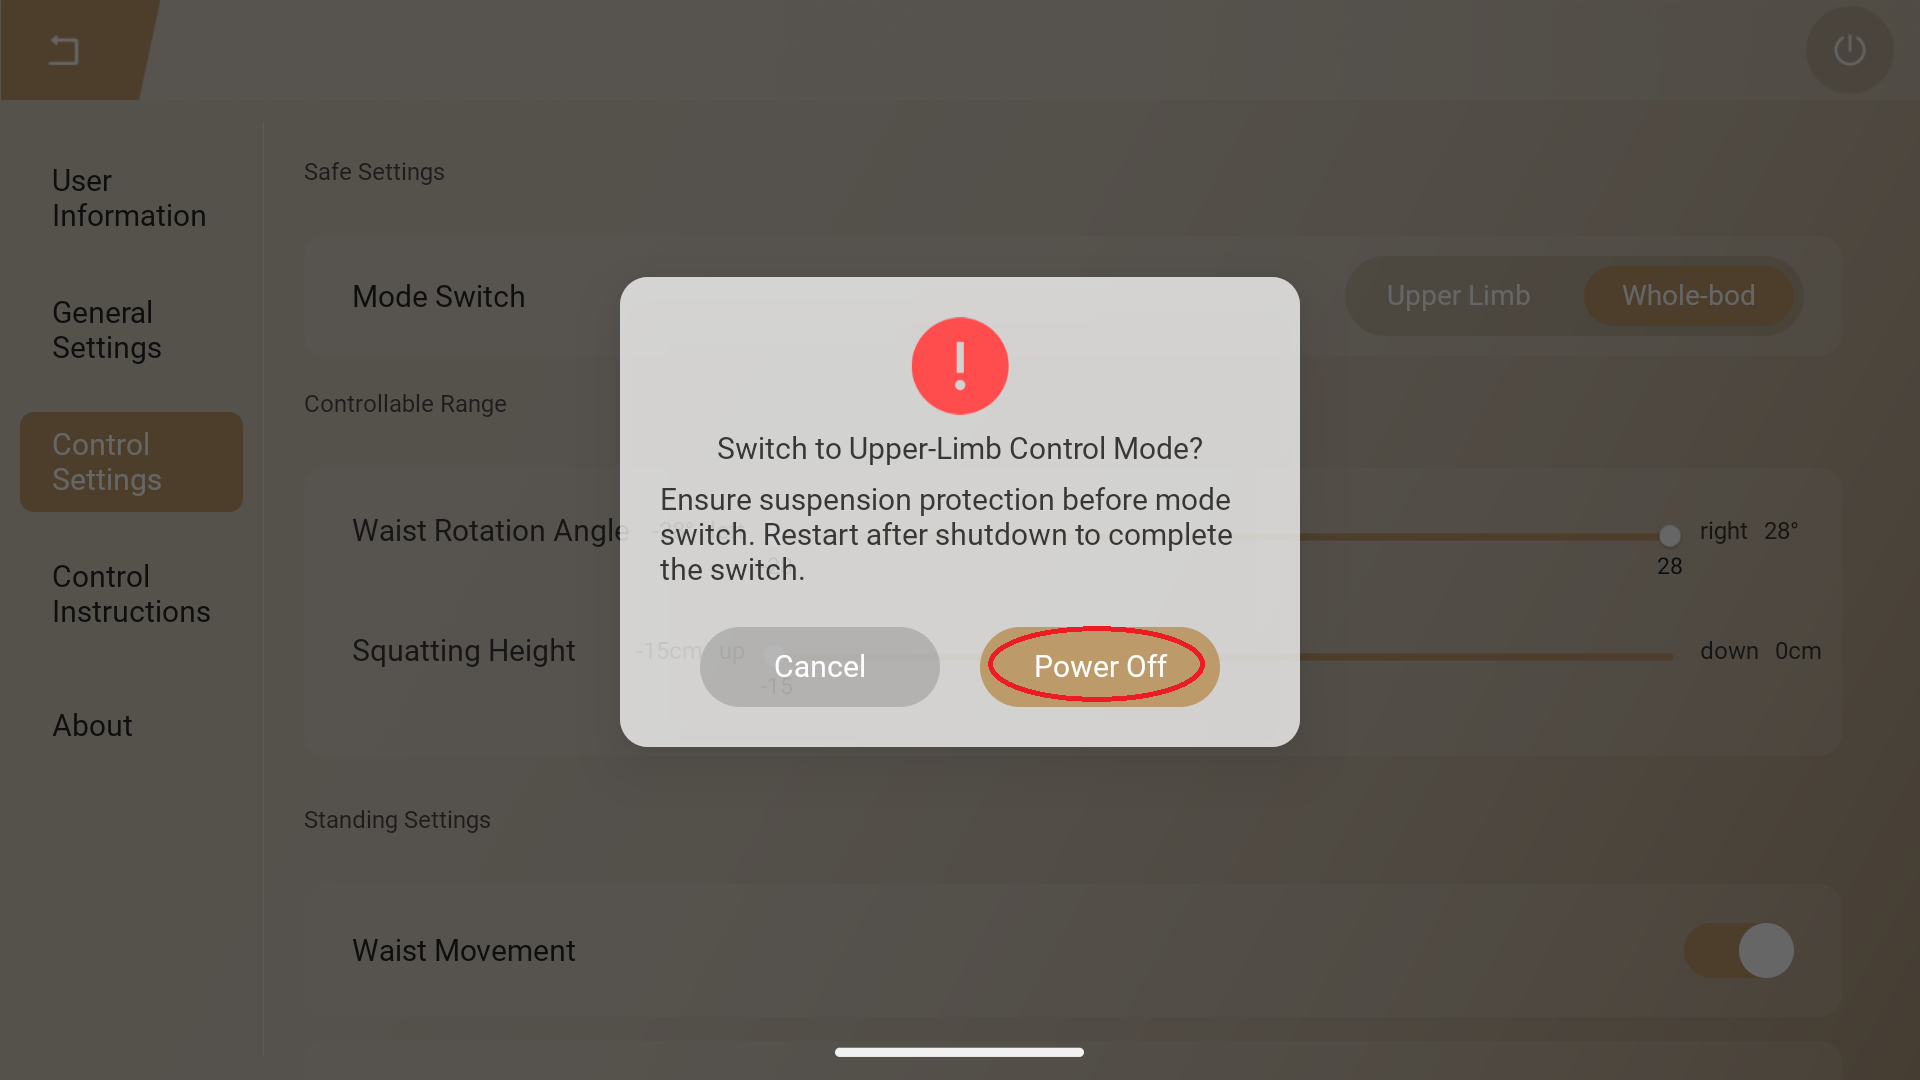
- When switching from Whole Body Mode to Upper Body Mode, tap the "Stand" button to make the robot enter the standing mode. Then, use the shifter to lift the robot and suspend it, ensuring the robot is in a safe and protected state, and activate the soft emergency stop function. Next, tap the "Settings" button and then tap the "Upper Limb" button to switch to the Upper Body Mode on the "Control Settings" page. Finally, tap the "Power Off" button on the pop-up prompt to shut down the robot. After the robot reboots, it will enter the Upper Body Mode.
- When switching from Upper Body Mode to Whole Body Mode, tap the "Settings" button and then tap the "Whole-body" button on the "Control Settings" page. Next, tap the "Power Off" button on the pop-up prompt to shut down the robot. After the robot reboots, it will enter the Whole Body Mode.
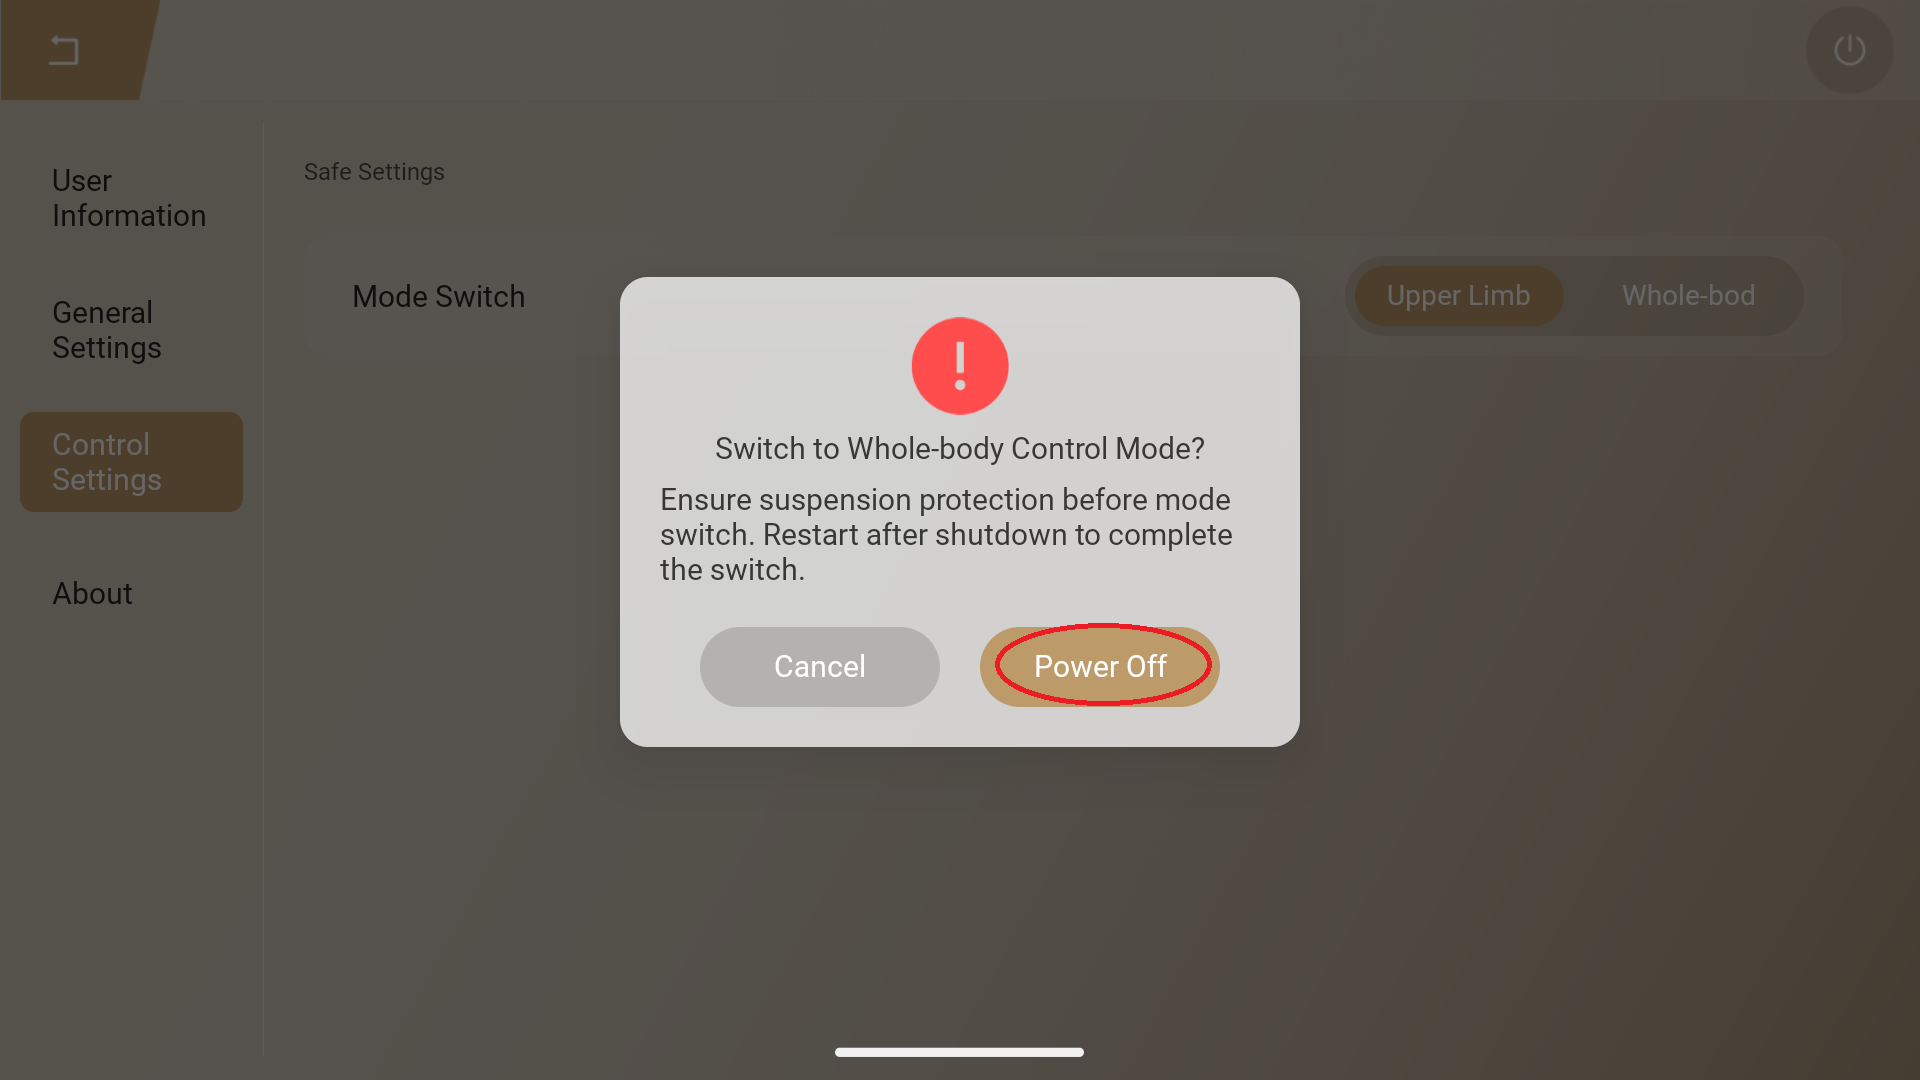
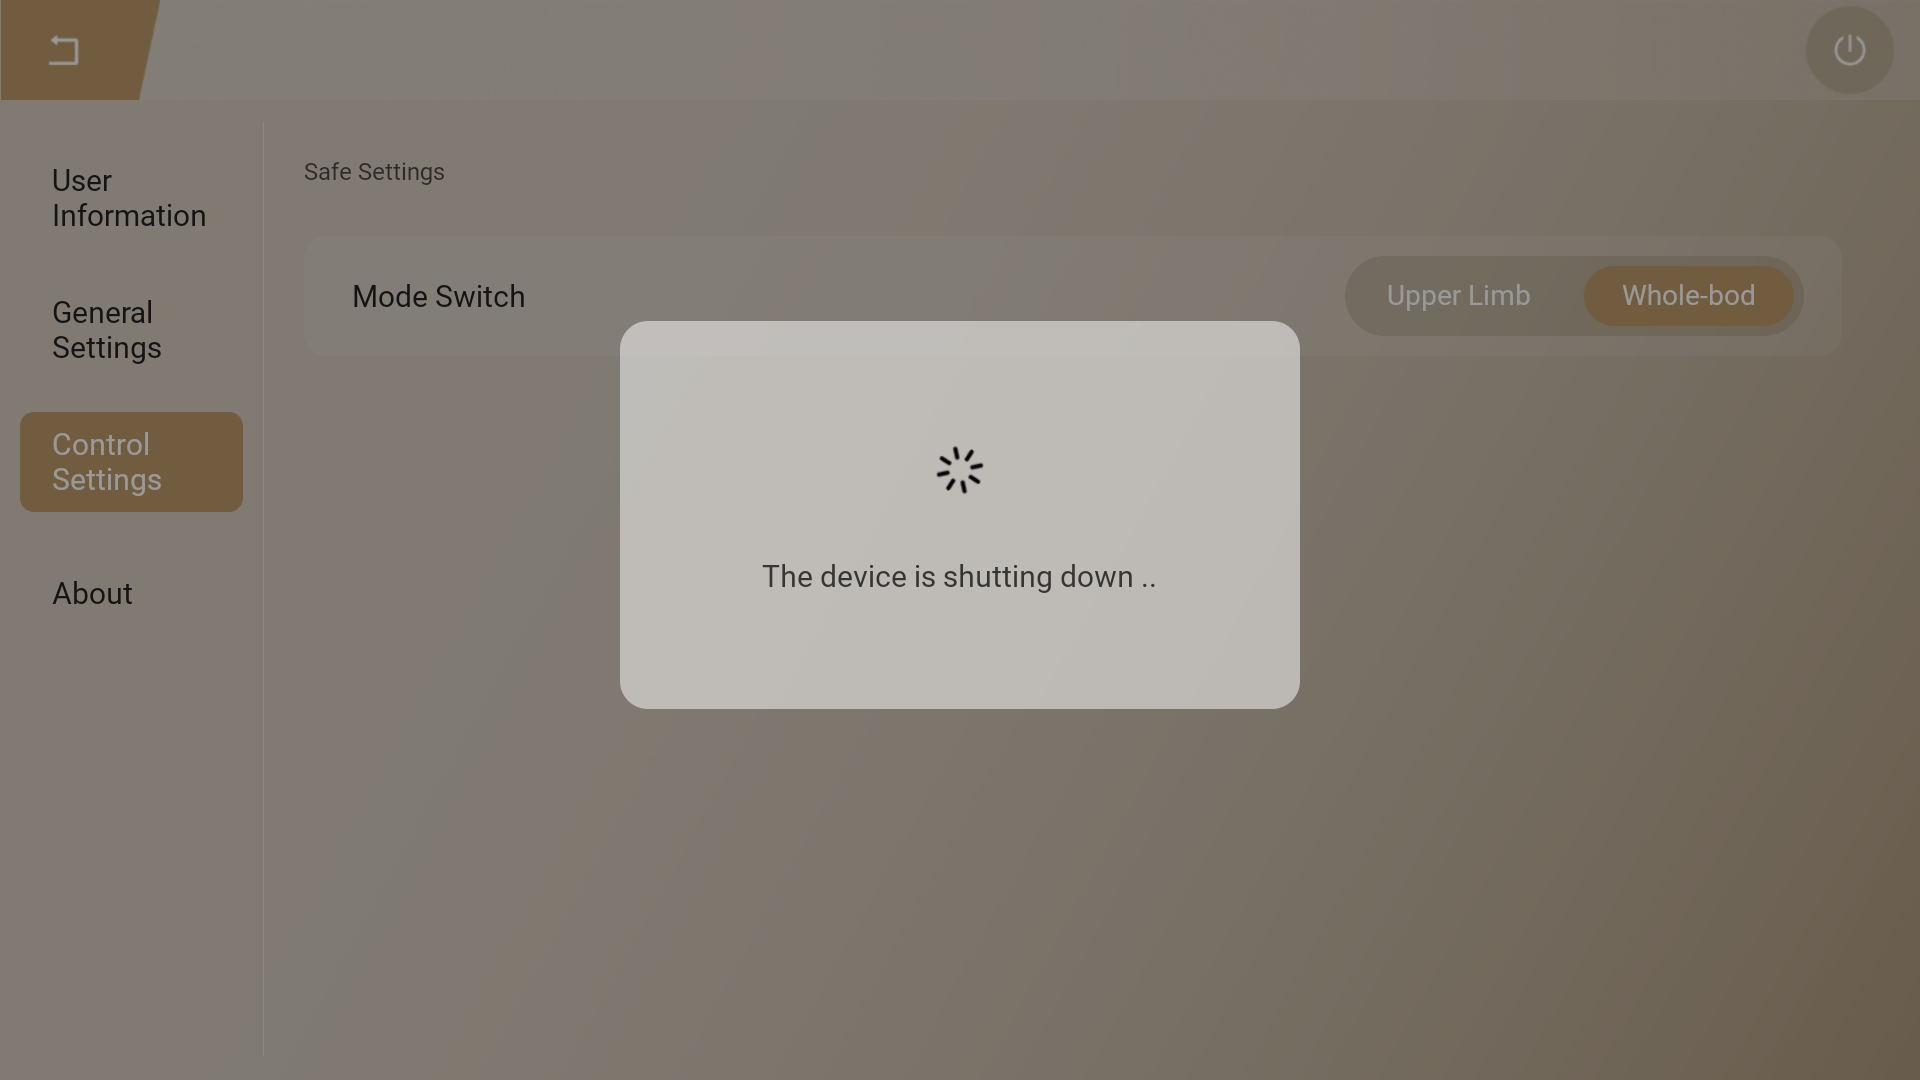
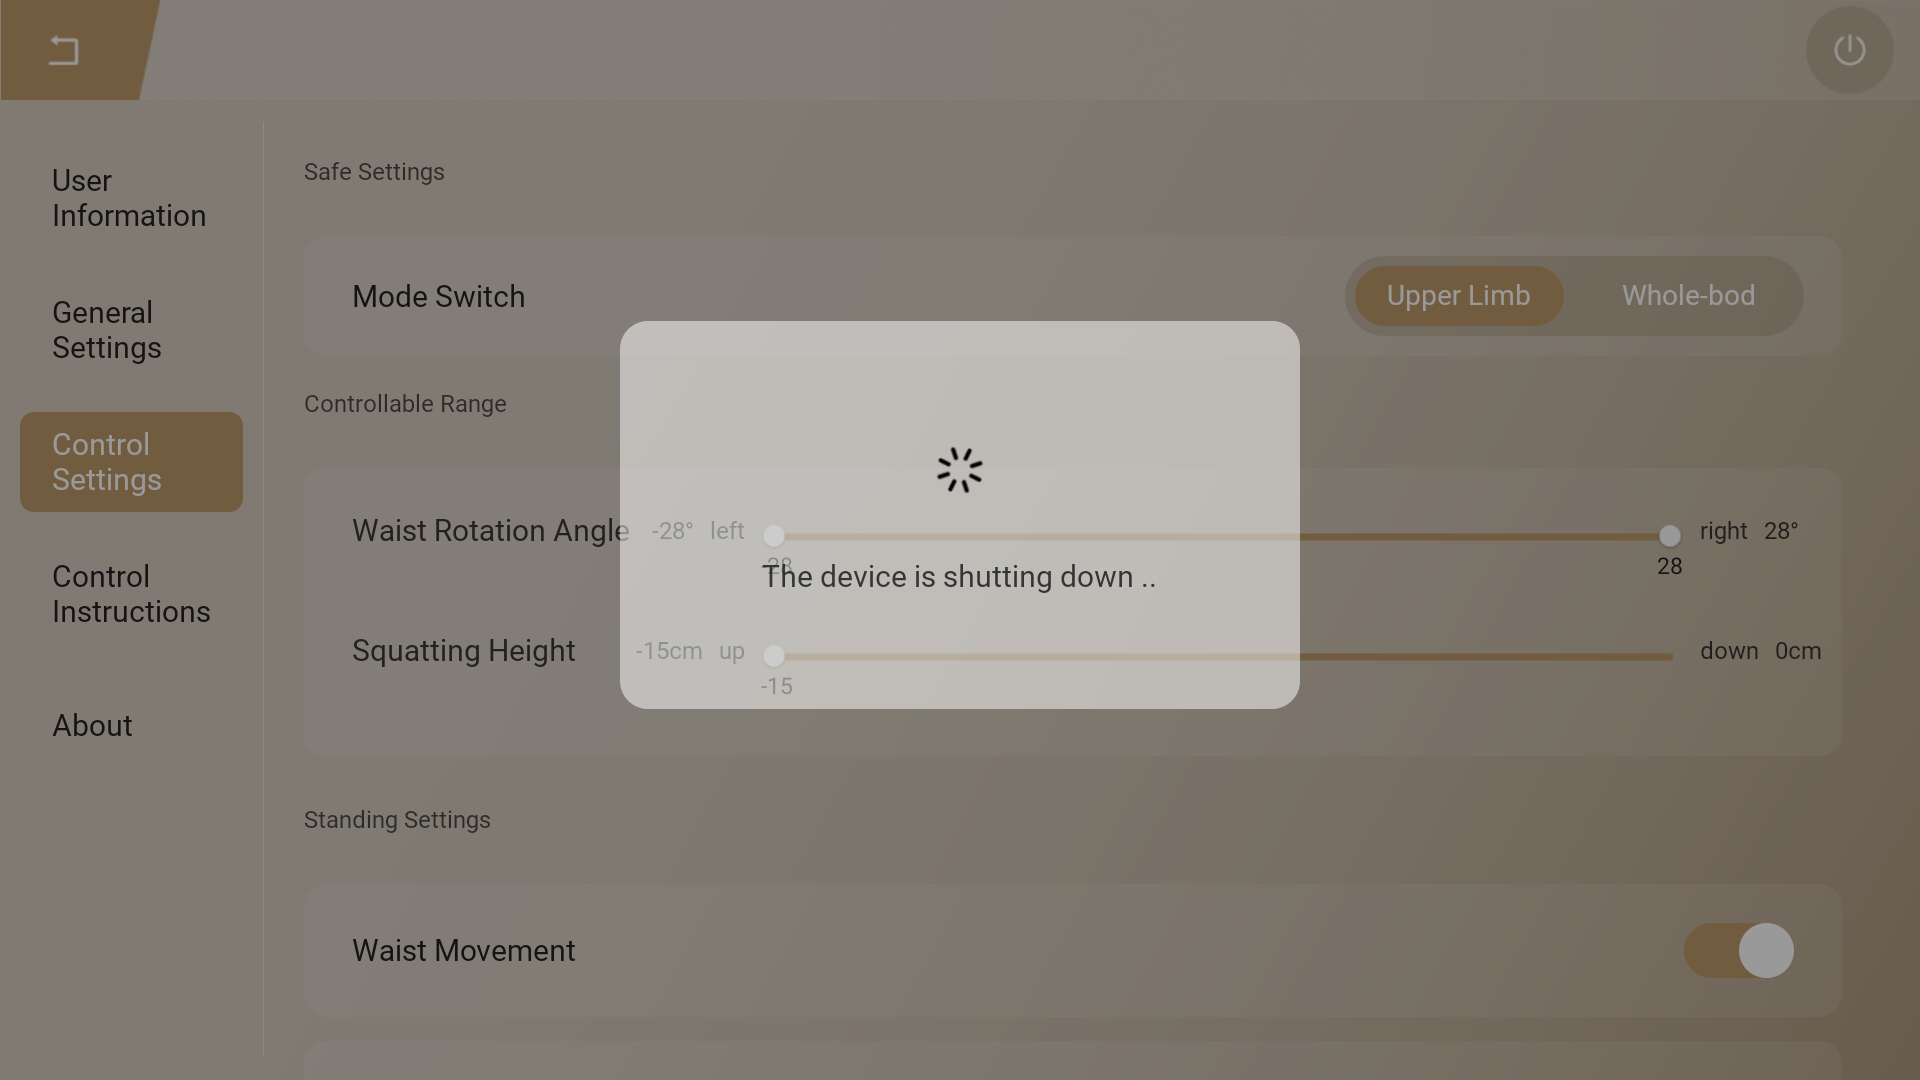
⚠️ Notice: When switching modes, the robot will power off completely after confirming shutdown by tapping the "Power Off" button. Therefore, ensure the robot is in a safe and protected state before performing the mode switching operations.
Upper Body Mode Operation
In Upper Body Mode, the lower limb actuators are energized but not enabled. Therefore, when executing predefined actions and touch interaction in this mode, the robot must be suspended on the shifter or static mounting bracket.
Startup
- After switching to the Upper Body Mode, reboot the robot, complete the connection between the handheld controller and the robot, and start the robot control program. (For more detailed operations, refer to "Starting the Robot Control Program" above.) The following interface will be displayed during the startup process.
- After the startup is completed, the upper limb actuators enabled, and the handheld controller will enter the FPV interface as shown in the figure below.
Upper Body and TOuching Interaction
- Tapping the target "Single" actions button or adding custom cyclic action groups can control the robot to perform corresponding actions.
- Tapping the "Touch Interaction" button activates the robot's autonomous mode. And in this mode, the robot will trigger a touch interaction when touch the top of robot's head, left or right cheek, or front chest panel.
- Tap the "Standby" button to enter standby mode, where the robot automatically plays random standby actions.
Soft Emergency Stop Function
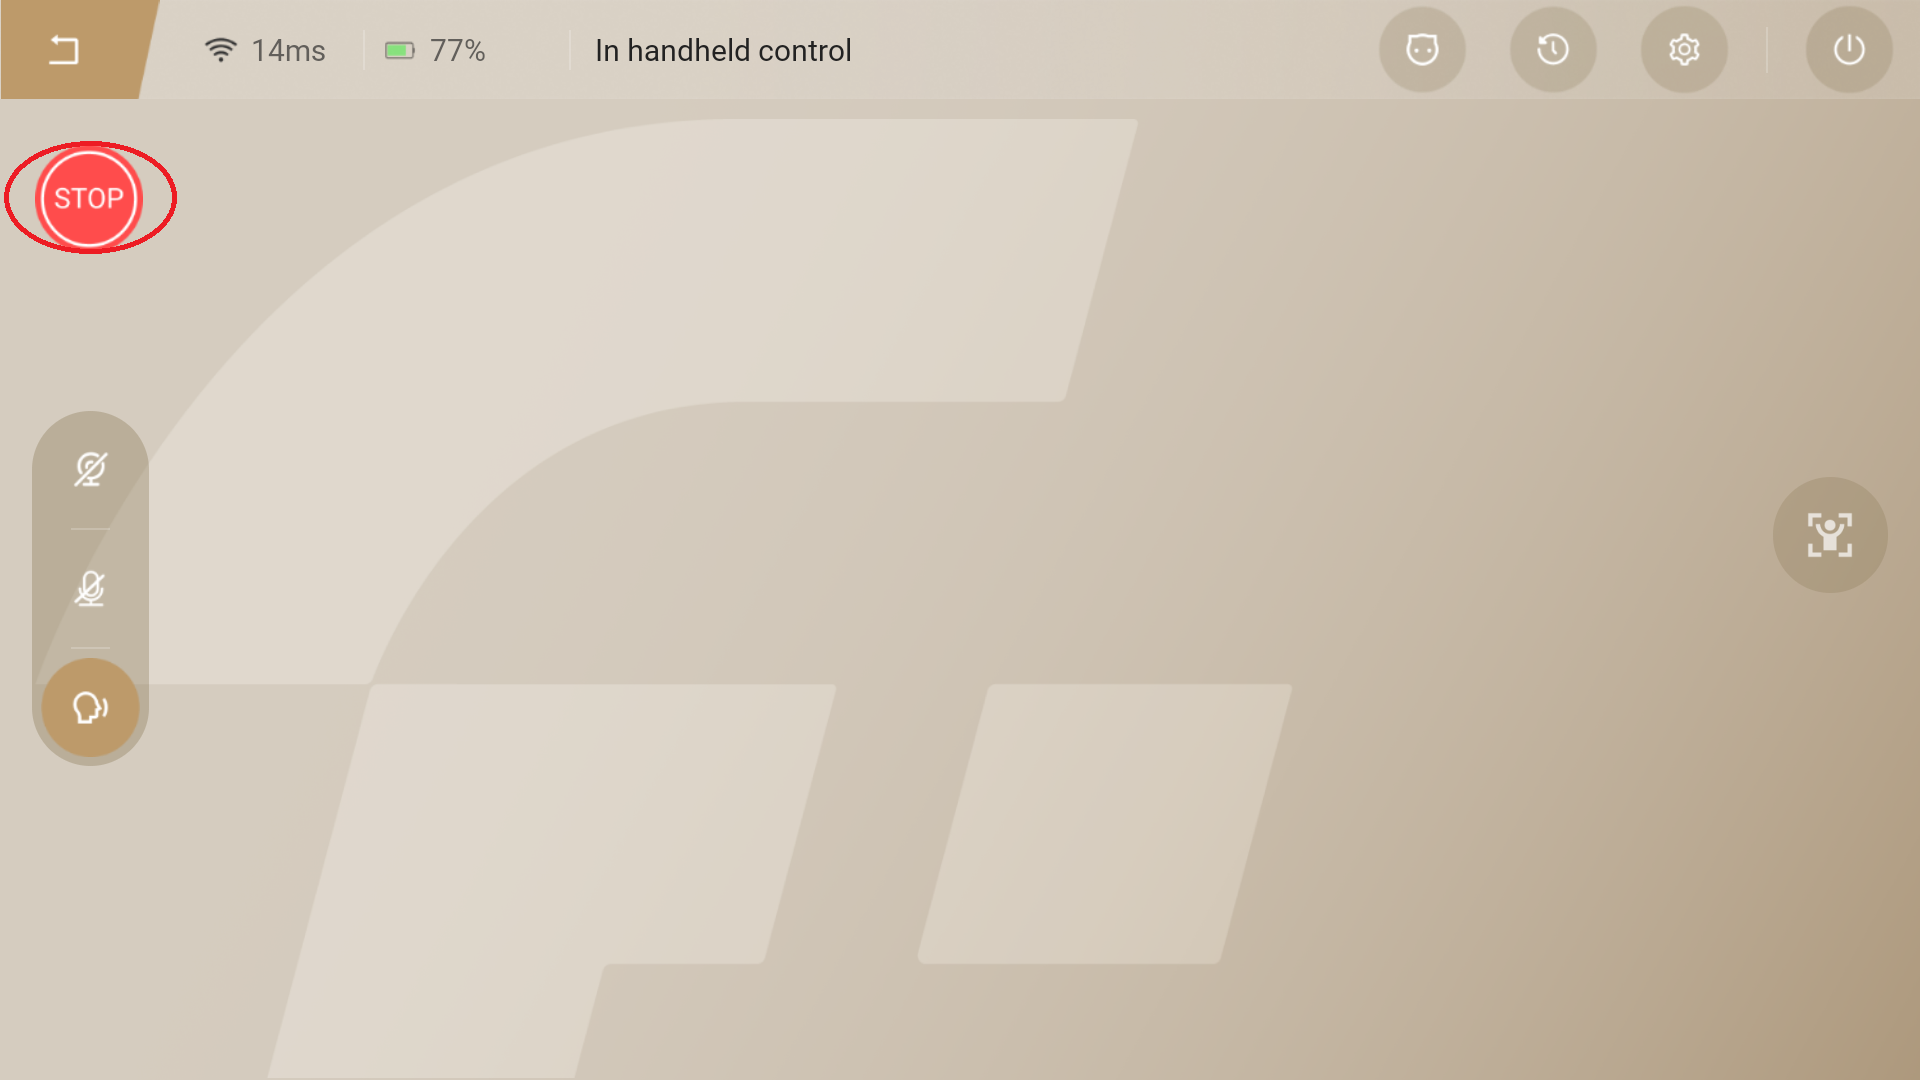
Press and hold the "Stop" button for 2 deconds to activate the emergency stop function. All actuators on the robot will immediately become disabled and stop working. Press and hold the "Stop" button for 2 deconds to deactivate the emergency stop function. The actuators will be enabled and restore normal operation.
⚠️ Attention:
Avoid activating the emergency stop function unless in critical situations, to prevent the robot from falling due to sudden deactivation. Before releasing the emergency stop, confirm that the robot is operating normally and keep a safe distance from its motion range to avoid injury.
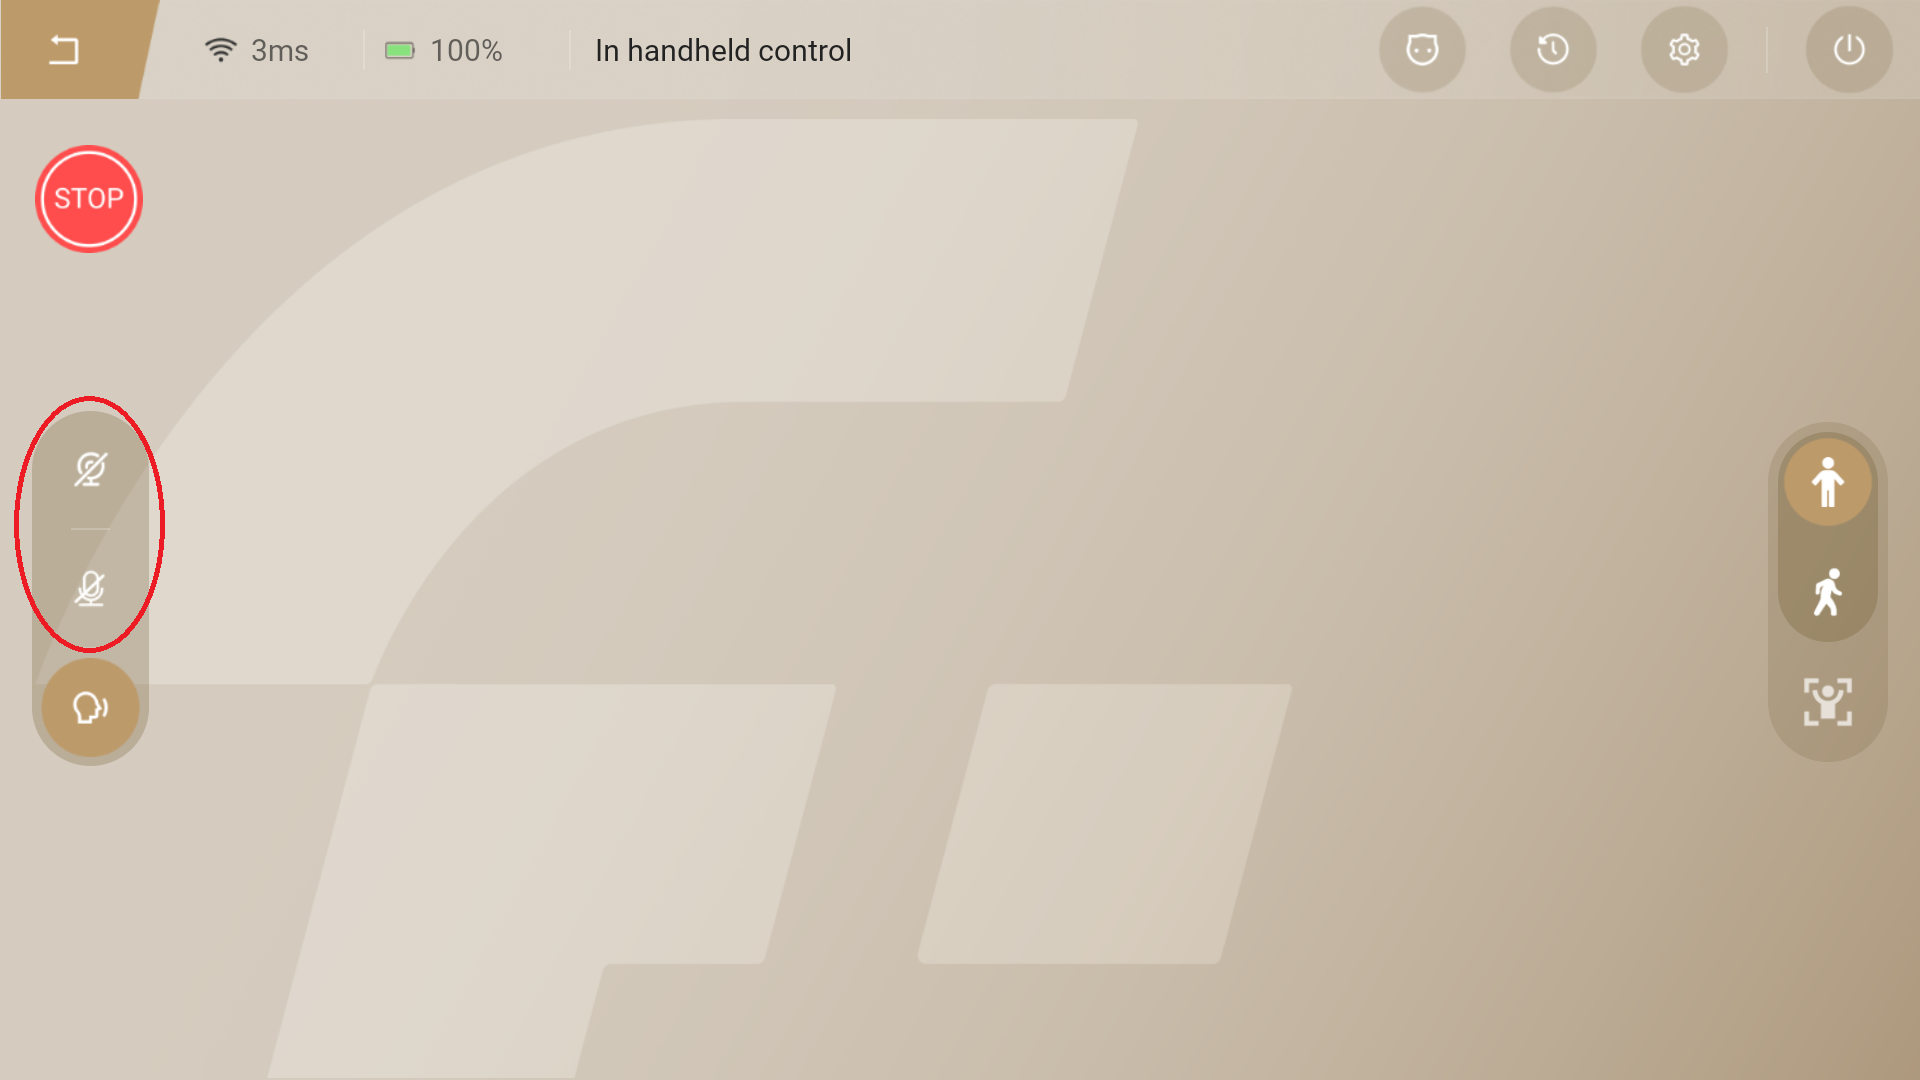
Video Transmission and Real-time Voice Interaction
-
Enabling the video transmission function allows you to view the robot's first-person perspective on the
-
Enabling the real-time voice interaction function enables real-time two-way dialogue between the handheld controller and the robot.