Unboxing and Power-On Tutorial
This stage covers the preparatory work before formal robot operation, encompassing the entire process from unboxing to system power-on. Correctly completing this stage is the foundation for ensuring the safe and stable operation of the robot. Please follow the steps strictly to avoid equipment abnormalities or damage caused by improper operation.
Unboxing Tutorial
Confirm Unboxing Materials
The unboxing materials include:
Robot body packaging box, ODIN2 Pro handheld device, USB Type-C docking station, user manual, pin, external emergency stop device, spare battery, battery charging converter, charger, wireless remote emergency stop device, fuse, network cable connector, emergency stop button protective cap, knee joint cover removal tool, calibration tool.
Lift Out of the Flight Case
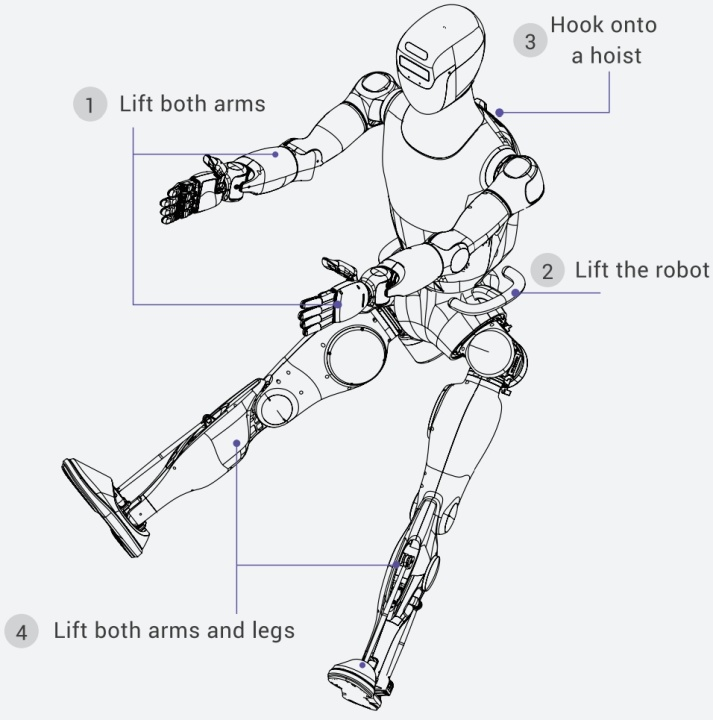
Unboxing the robot requires three people. Two persons lift the robot's arms respectively, while another person assists in propping up the robot. Fix the hook on the back of the robot's neck to the transfer machine. Then, the two persons lift the robot's arms and legs, and one person presses the ascent button on the transfer machine to steadily hoist the robot out of the flight case.
Power-On Tutorial
Step 1: Install the Battery
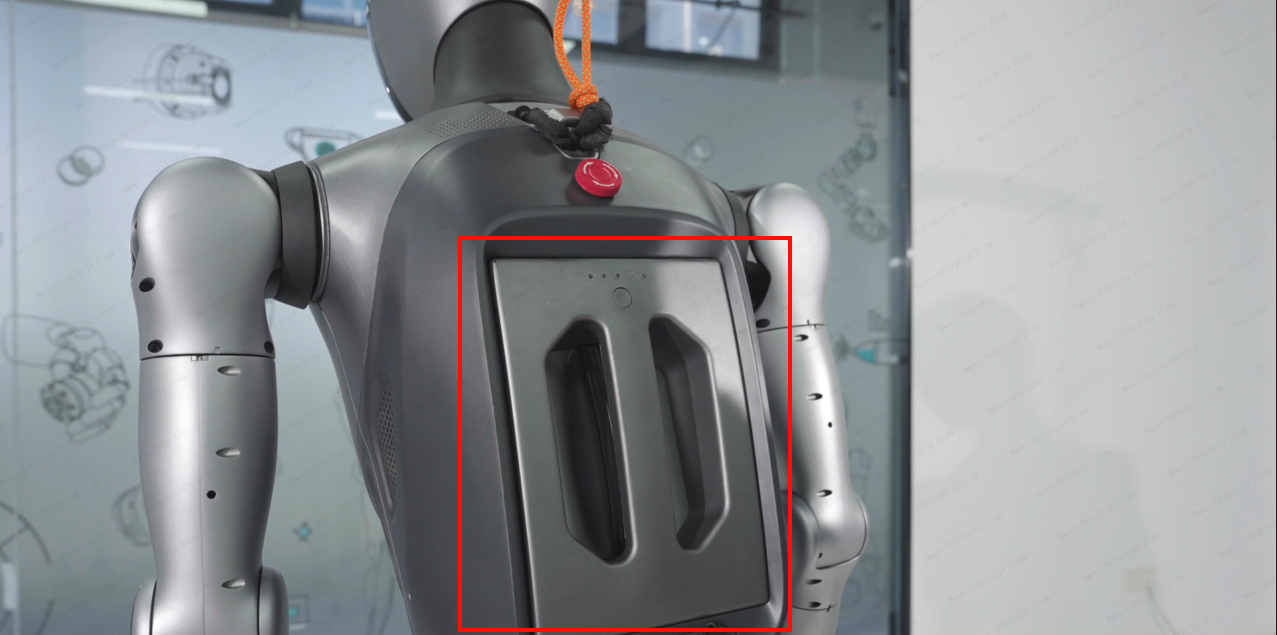
Insert the battery into the battery port on the back of the robot. You will hear a "click" sound when it is properly seated.
Step 2: Power On the System
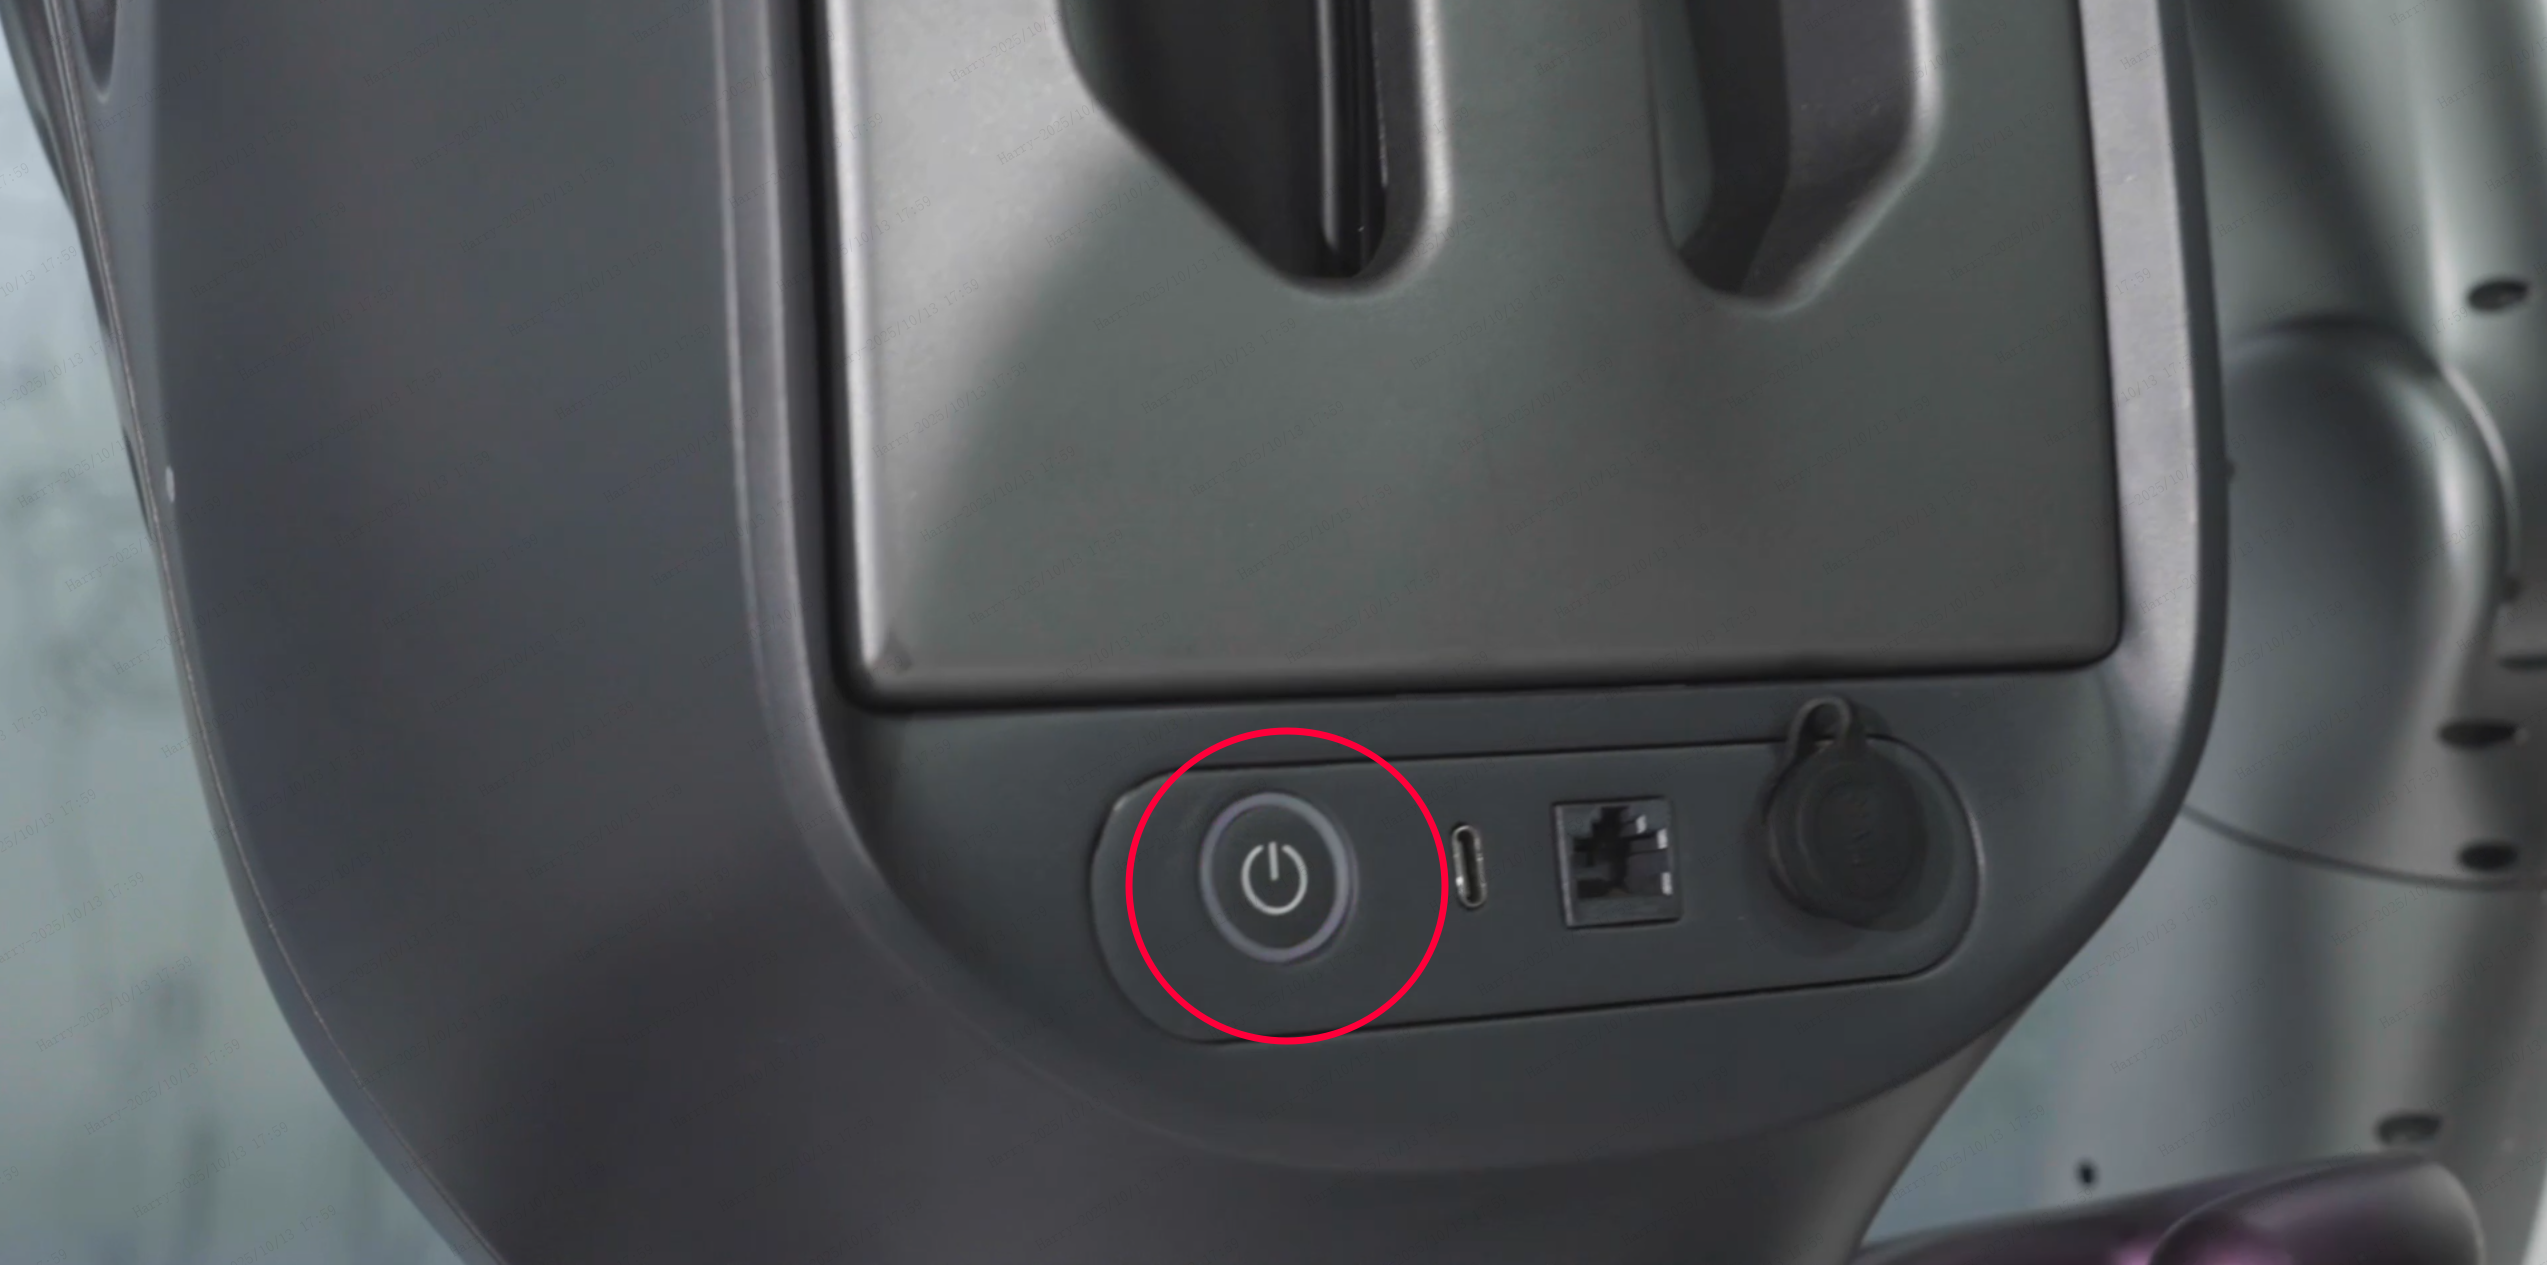
Press and hold the battery power button for 3 seconds. The system is powered on after the battery lights up, accompanied by a "beep" prompt sound.

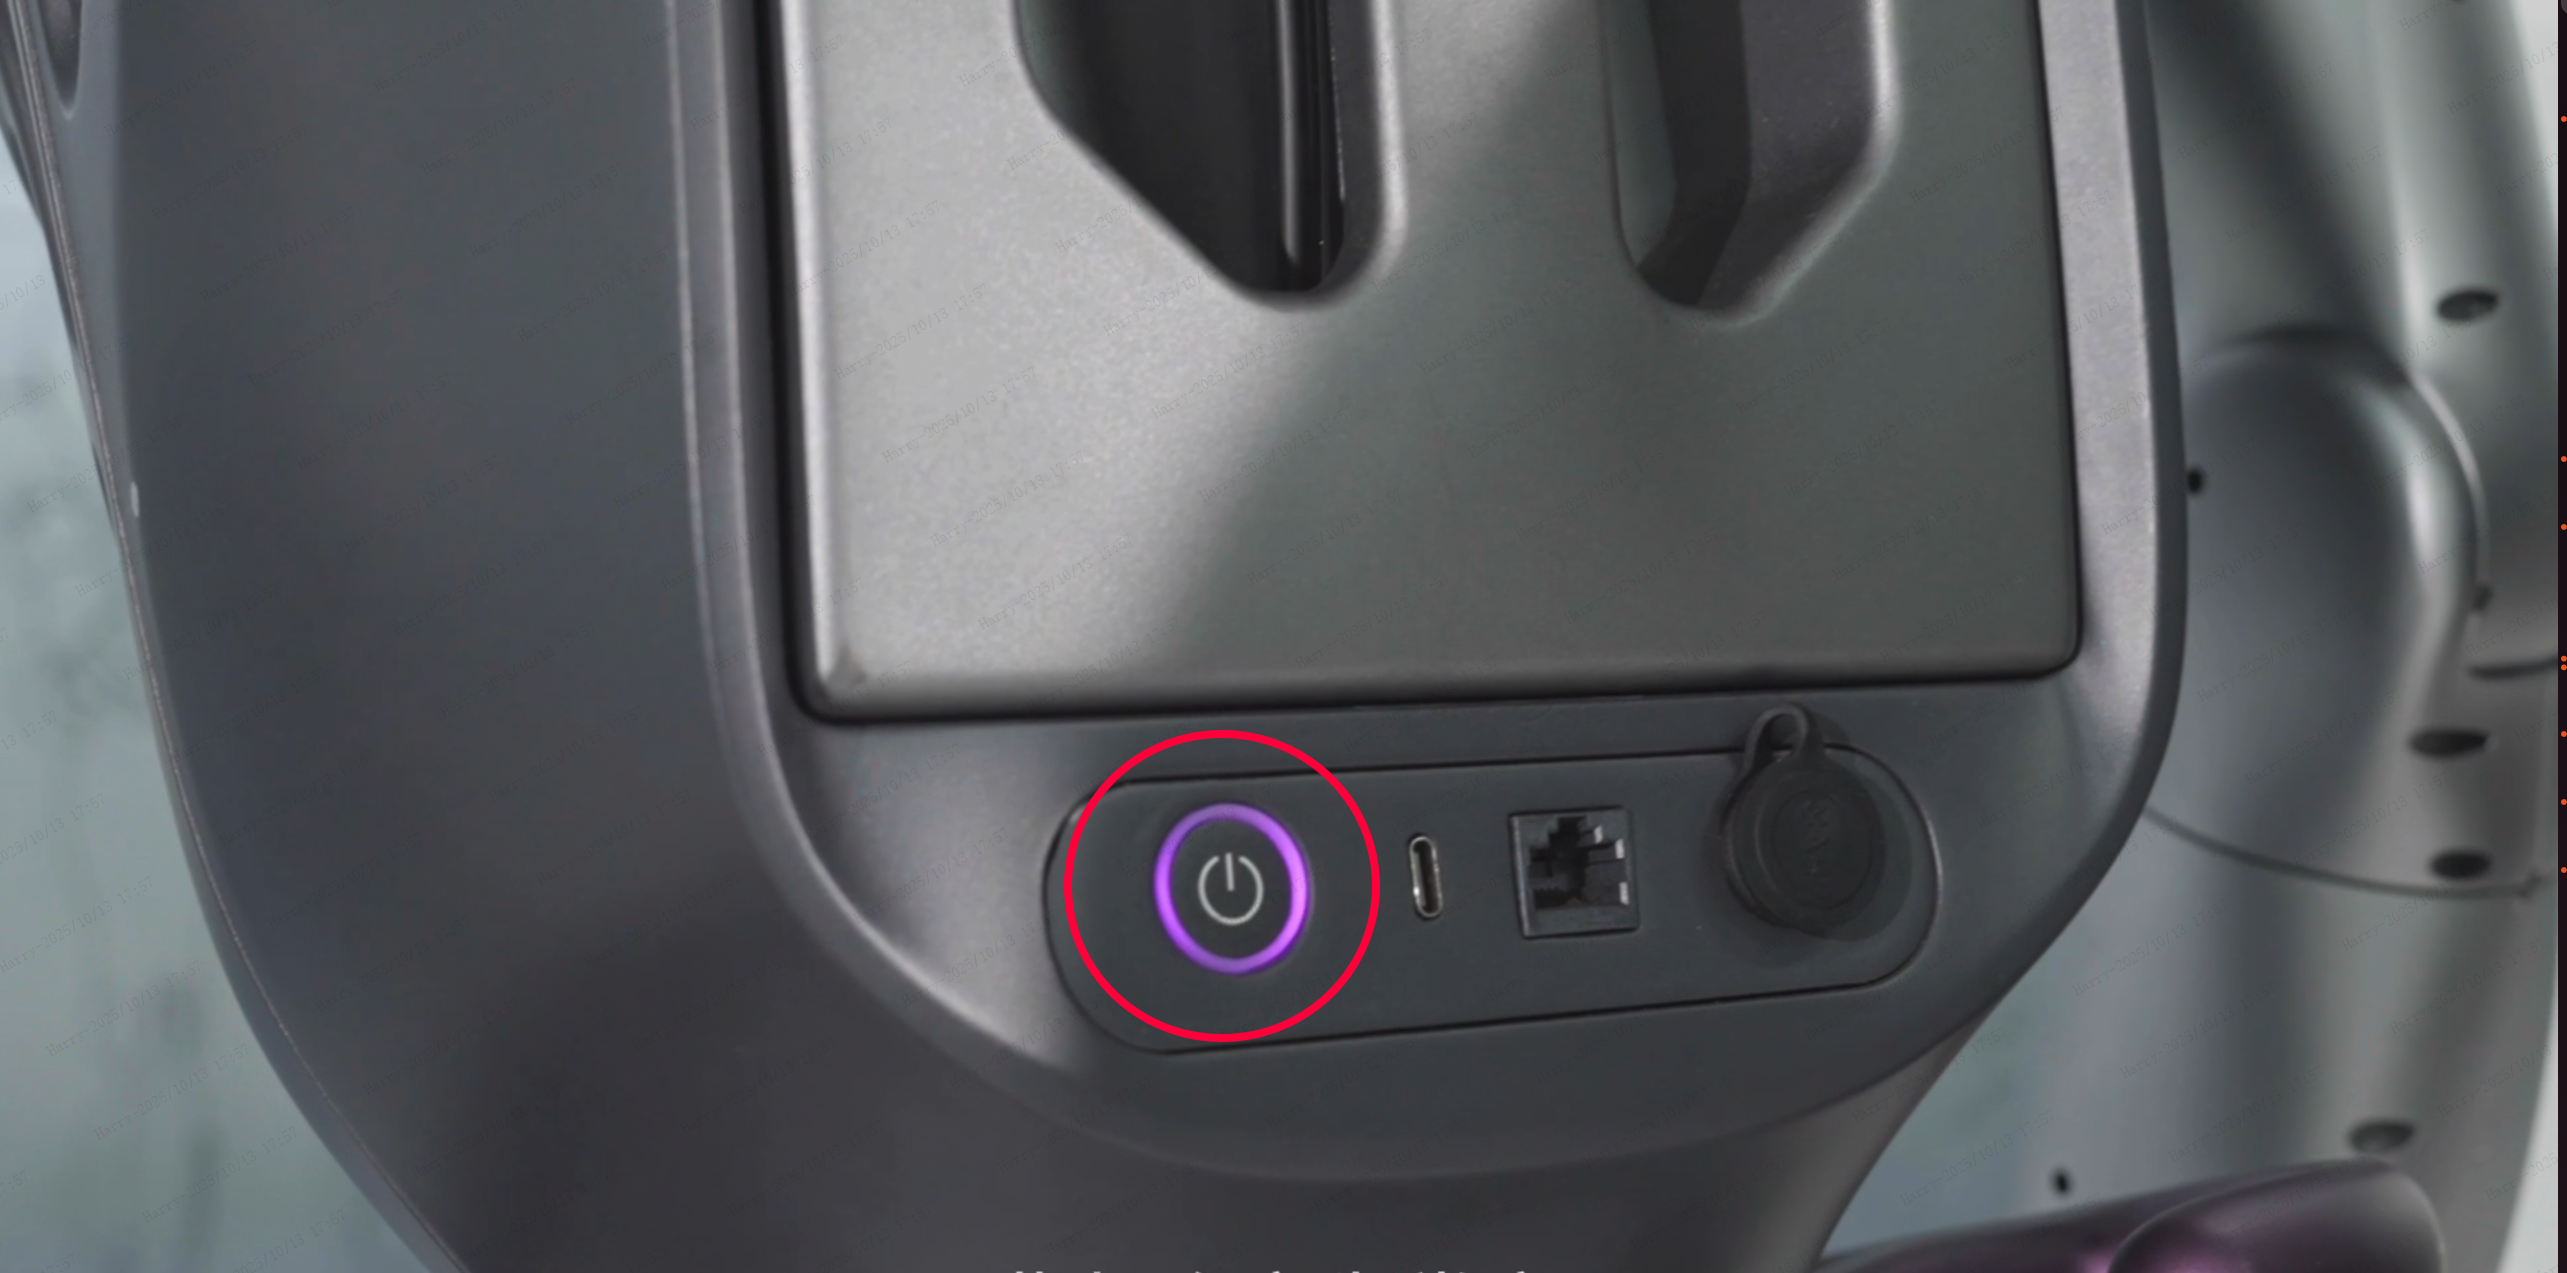
Press and hold the system power button, release the button after the purple light flashes, and wait for the purple light to stay solid.
Step 3: Release the Emergency Stop
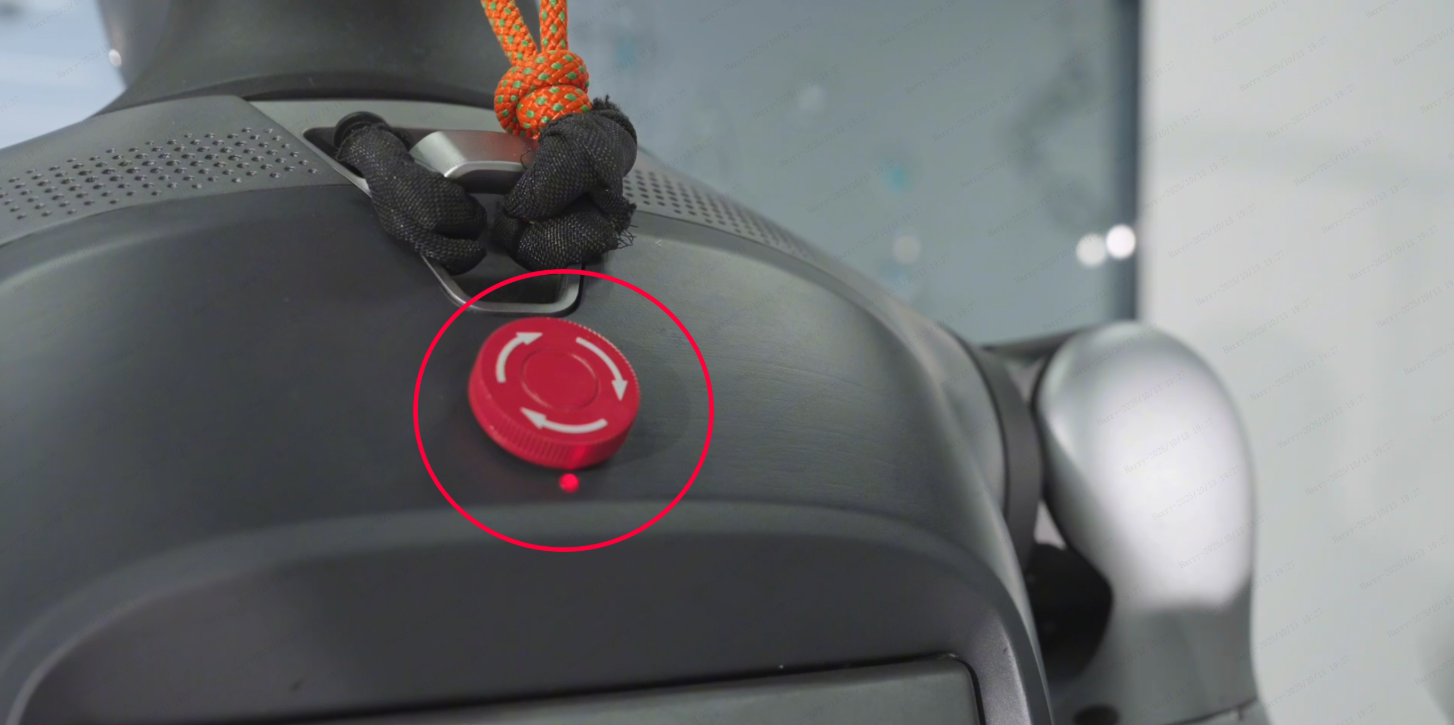
Rotate the button to release the emergency stop. The dexterous hand will perform an initialization action.